
Add funds 00:49
Manage Advertiser 01:15
Add an Offer 01:48
Setup your Campaign 02:55
Create a List 05:04
Real Time Reports 05:37
Welcome to Bucksense, your partner in media buying via Real time bidding.
We are connected to the main Ad Exchanges for mobile and desktop.
And enable you to create a variety of campaigns using Display ads, Native, video and ad tags.
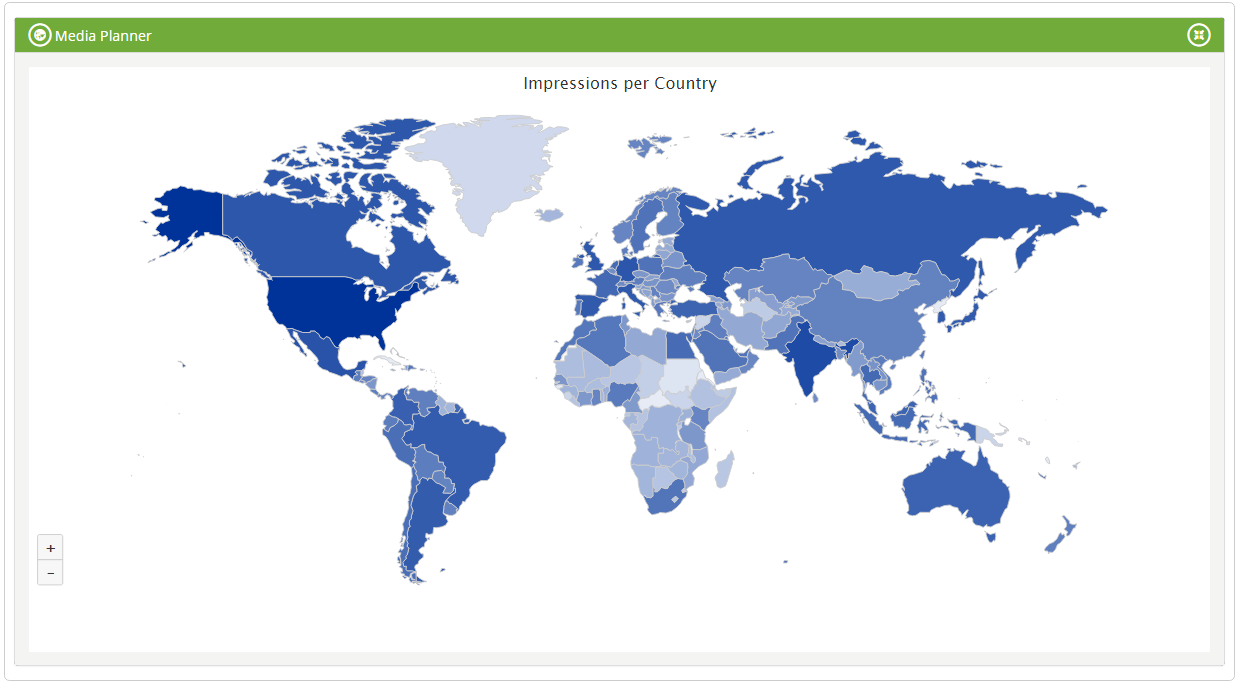
There are no commitments to start: no minimum, monthly fees or set-up fees.To help you with the planning, you will find information about our available inventory in our Media planner.
Go to Prospecting> Media Planner and select the geos that you are interested in. It will help you getting an overview of the available traffic.
 Now let’s get you started!
There are few steps to follow to setup your first campaign:
- First Add funds to your account
- Then manage your Advertisers
- Add an Offer
- And that’s it, you are ready to setup your first Campaign!
- Check the Acquisition Report
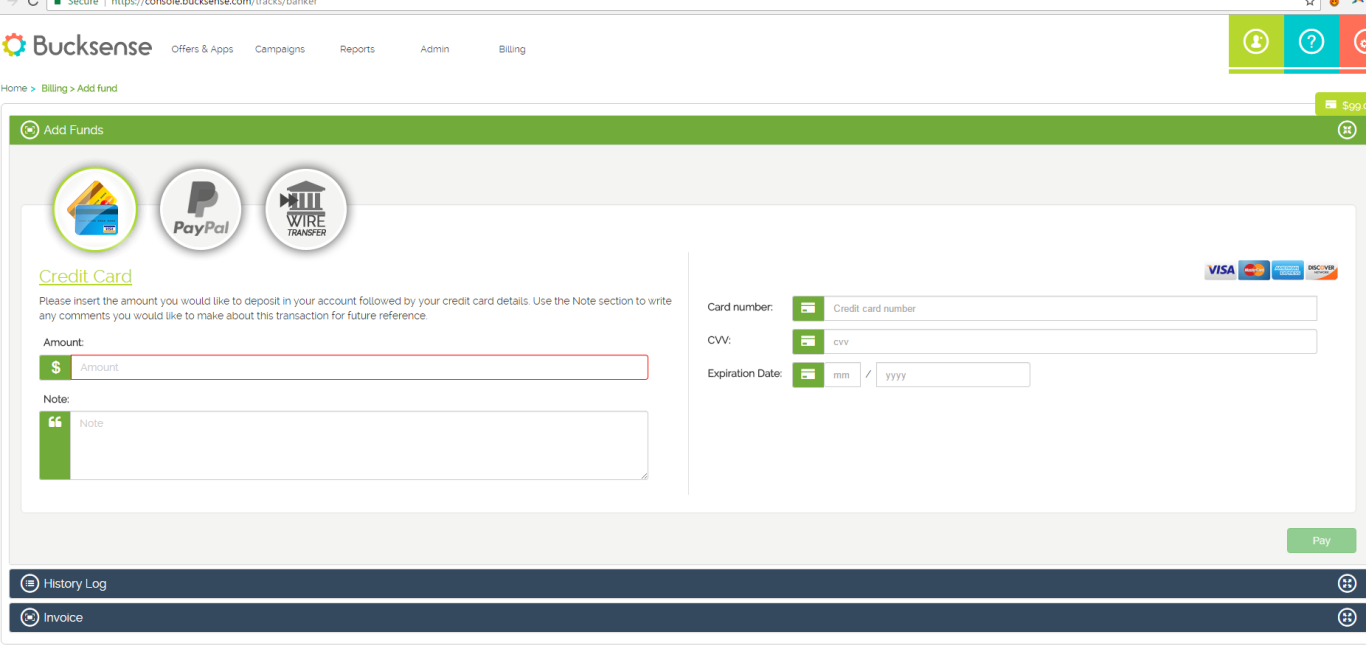
1 ADD FUNDS
First, you need to add funds to your account.
The easiest way is to prepay. Go to Admin> Add funds and pick the method you prefer.
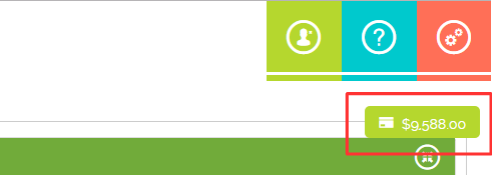
Funds will be added to you global wallet, you can see the amount left here:
If you are interested in post-pay, please contact your account manager to start the process.
Once the funds are available in your global wallet, you will assign them to an Advertiser.
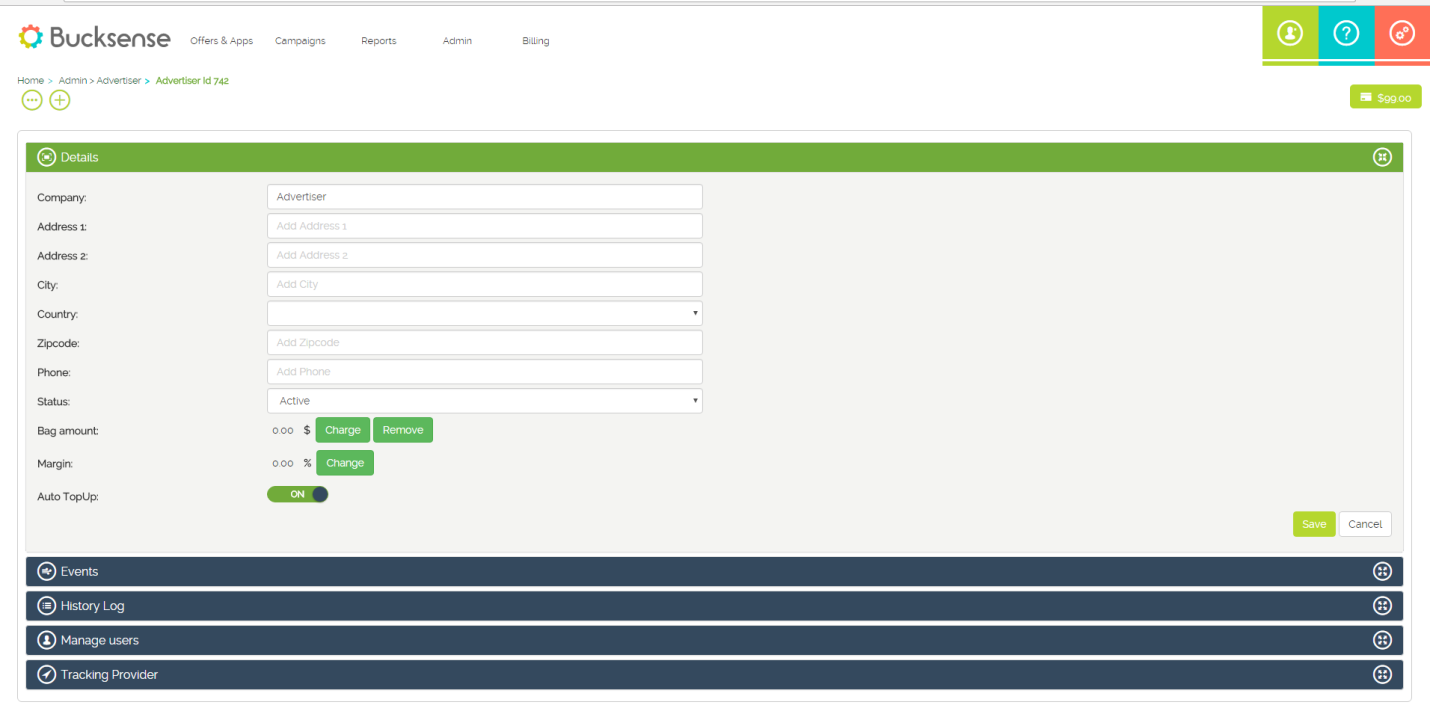
2 ADVERTISER MANAGEMENT
With Bucksense you can organize your offers and campaigns by advertiser.
We already created the first one for you. You can add more here, and, assign a budget to each of them.
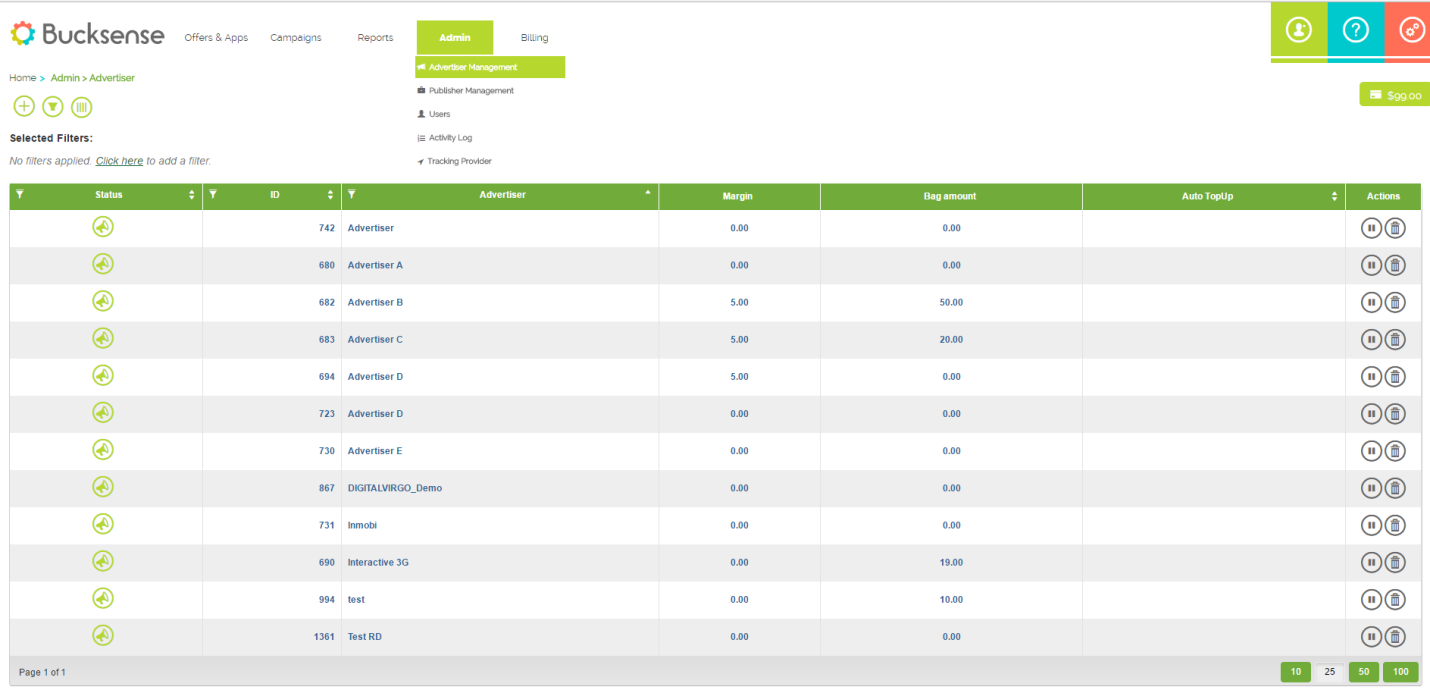
If you only handle one advertiser, we recommend that you enable the budget Automatic Top-Up option. This way, the advertiser will directly spend the funds from the global wallet and you won’t have to worry about it anymore.
To enable it, click on the advertiser and turn on the Auto top up like this:
Ok, you have an advertiser with a budget assigned. Now it’s time to create your first Offer!
3 CREATE AN OFFER
Bucksense platform has multiple levels to organize your campaigns.
First you need to setup an offer. This is the product or service that you are promoting, with its corresponding tracking links.
Offers will serve as a logical grouping, which can be useful for reporting purposes later on. It will also save you from adding the tracking url every time you add a new campaign.
Once you setup the offer, you can move on to adding the campaigns. Note that you can create multiple offers for each advertiser.
You can add a new offer from the offer list section
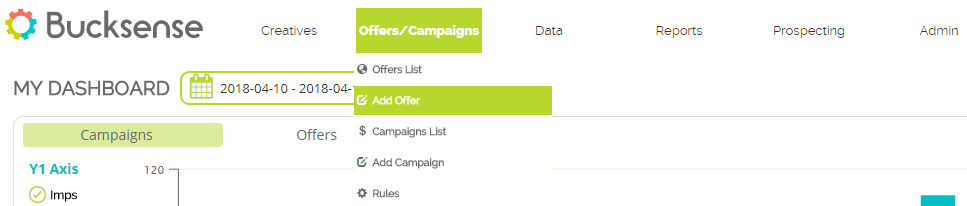
or directly in the campaign setup page (by selecting Add campaign below Campaigns tab)
To create an offer:
- Pick an advertiser if you have more than one
- Name the offer
- Add the Landing page url and the macros that you will need. If you want to track conversions in the Bucksense report, add the {transaction_id} macro and to implement our pixel.
Find more information about tracking here - Select the tracking method you will use, if you don’t want to track conversions in our Report, select None
- Set a Start date and an End date (optional) for your offer
- Cap Settings Daily and/or Total for Impressions, Clicks and Budget can be added in the related fields
- When you save your offer, you will see new sections available. Click on Additional url if you want to add more than one tracking link or landing page in your offer

Now that you have added the advertiser and the offer, you are ready to setup your campaigns.
4 CREATE A CAMPAIGN
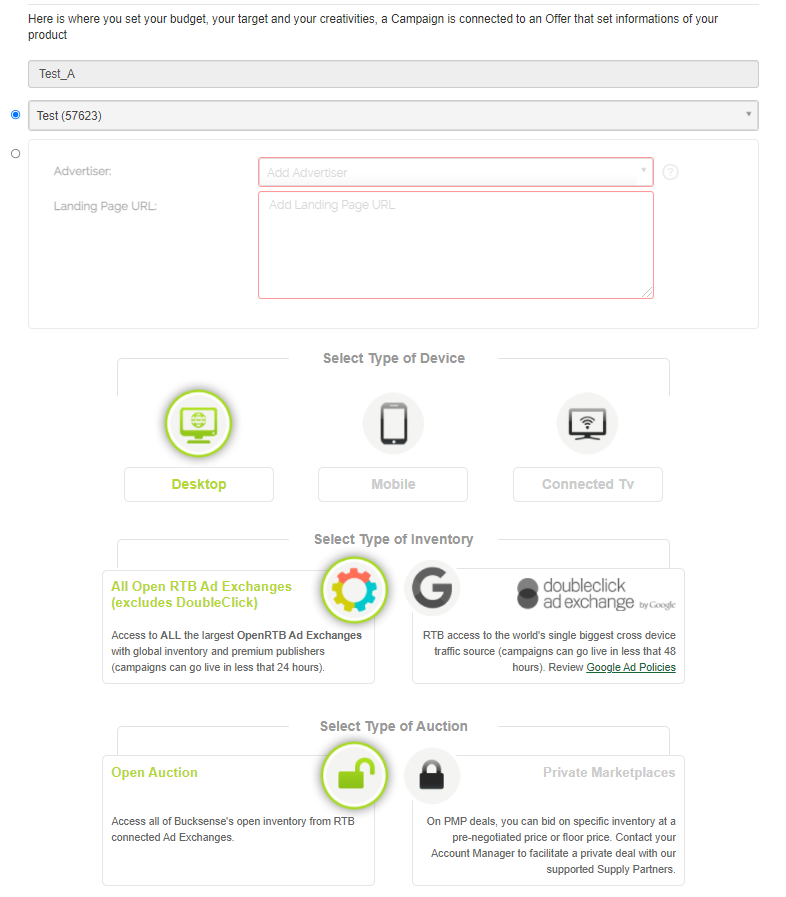
Go to Offer/Campaigns>Add Campaign and fill in the preliminary fields.
Name your campaign and select the offer that it belongs to
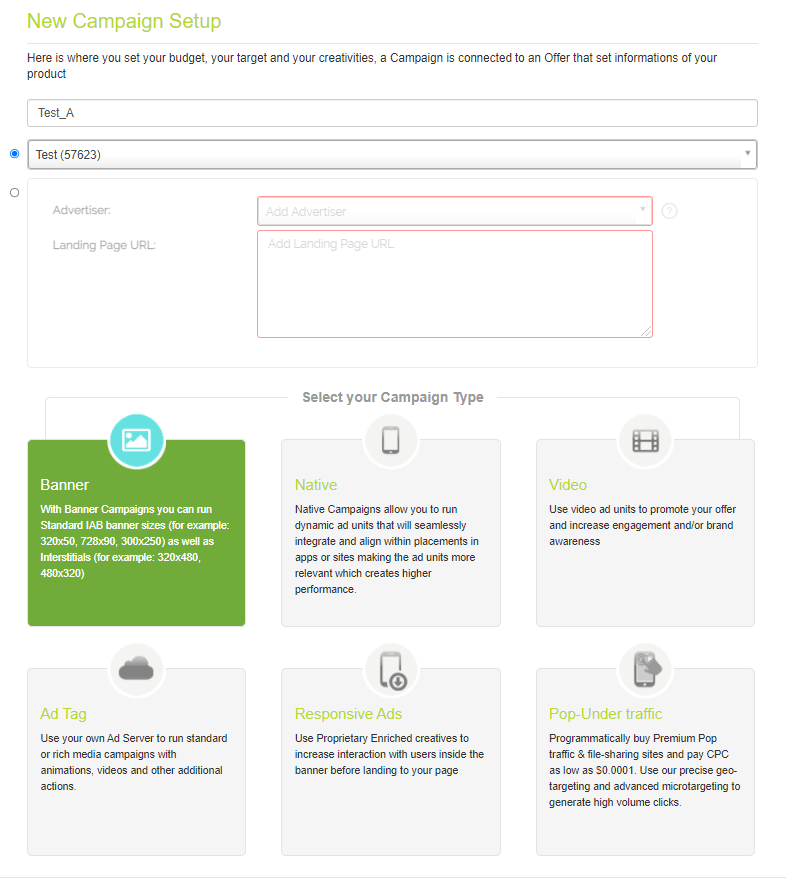
or create a new offer by selecting the advertiser from the drop down menu and by typing the LP url
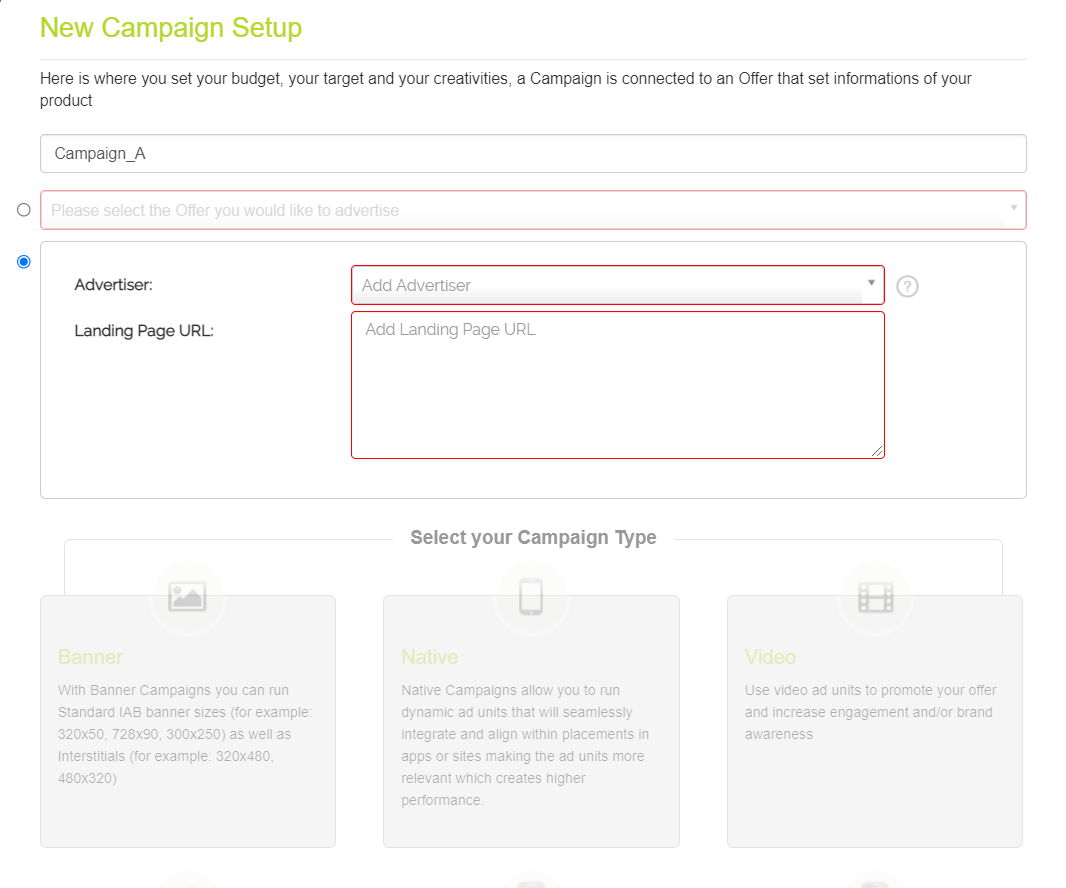
Choose the Campaign Type: Native, Banner, Video, Ad Tag or Pop Under. Click on next.
Based on the Campaign Type you have selected, choose the Inventory (All Open RTB Ad Exchanges or Double Click Ad Exchange), the Type of Auction (Open Auction or Private Marketplaces) and the Type of Device
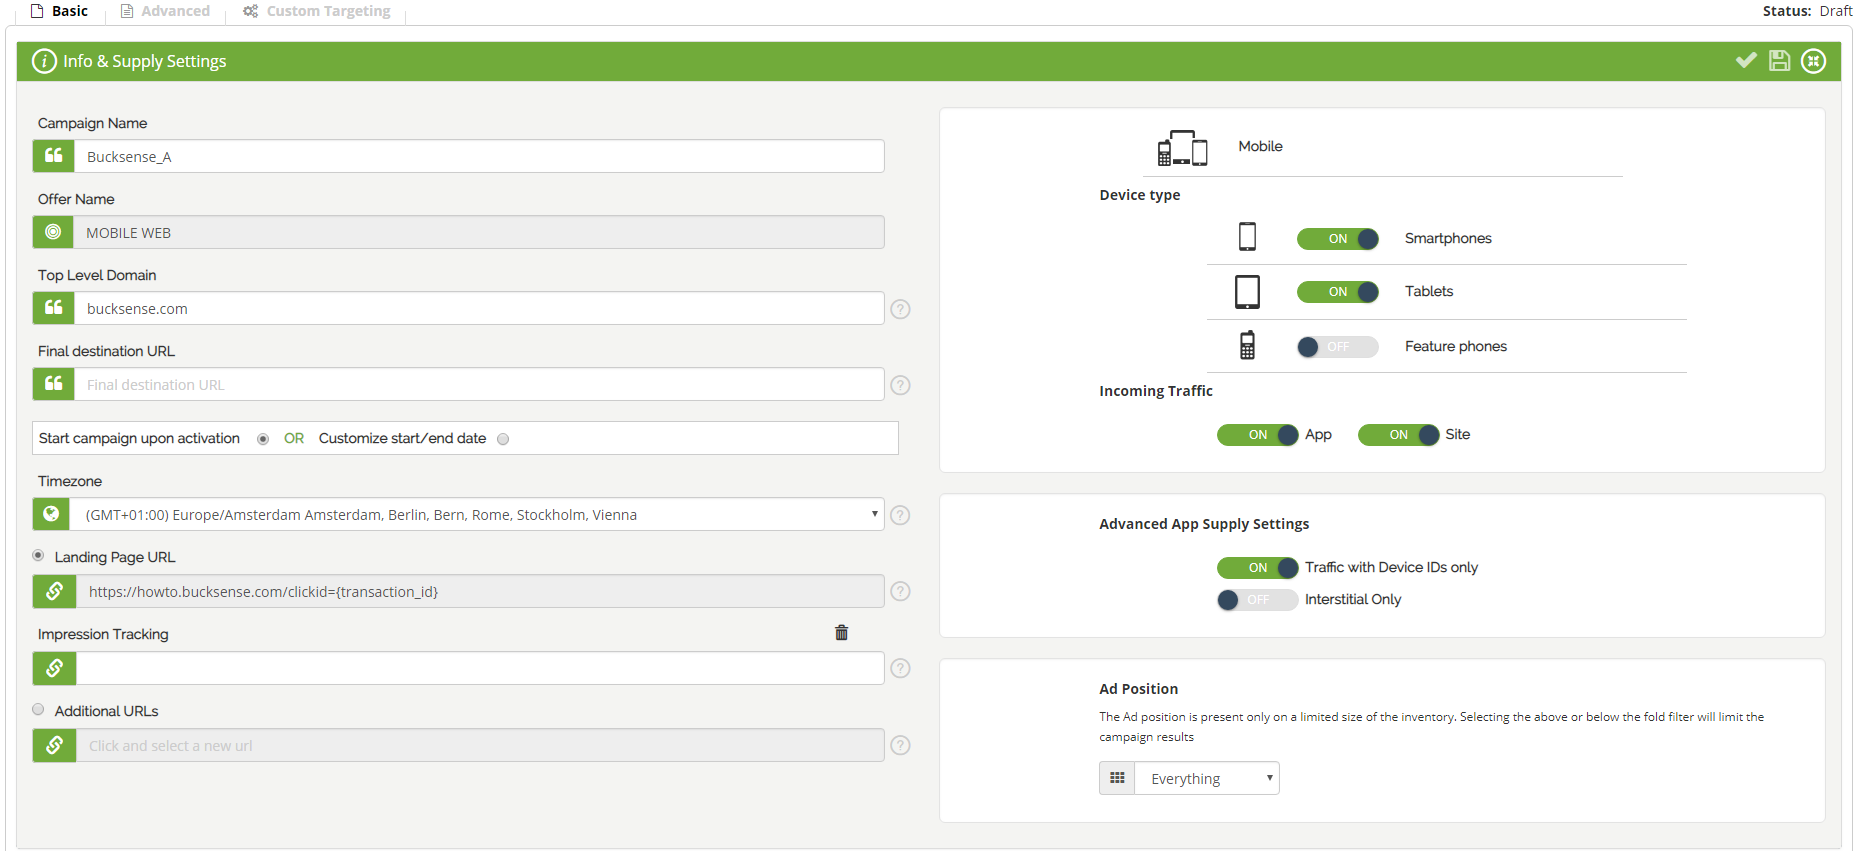
You now see the campaign settings page.
There are 3 settings types in the campaign: Basic is for initial targeting, Advanced is to narrow it down. And finally Custom is where you can create lists and do contextual targeting.
BASIC SETTINGS
Basic settings gather the mandatory information required to activate a campaign.
Add the Top Level Domain of your campaign. It should be the domain of your advertiser, not the domain of your tracking link.
It is important to fill it in properly for creative audit purposes.
Select the tracking link among the urls you added in the offer, or run with the default url. Choose the Device type and Incoming Traffic (in app or mobile web).
Advanced App Supply Settings can be enabled for mobile campaigns:
- Traffic with Device IDs only (enabled by default): it allows you to target your mobile campaigns only on the exchanges that provide inventory with the device ID. This option is selected by default to ensure you high ad quality standard. Disable it if you want to reach higher volumes of traffic
- Interstitial Only: enable this option if you only want interstitial banners running in your campaign
The Ad Position option allows you to set a specific target for the position of your ads.
First of all choose one of the 3 following options:
- Everything: select this option to palce your ads everywhere across the page
- Above the fold: select this option in case you want to place your ads on top on a page
- Below the fold: choose this option to place your ads at the bottom of a page. The users will need to scroll down the page to view your banners
Please note that the Ad Position option is only present on limited sizes within the inventory pool. Selecting the above or below the fold filter, will limit the campaign results.
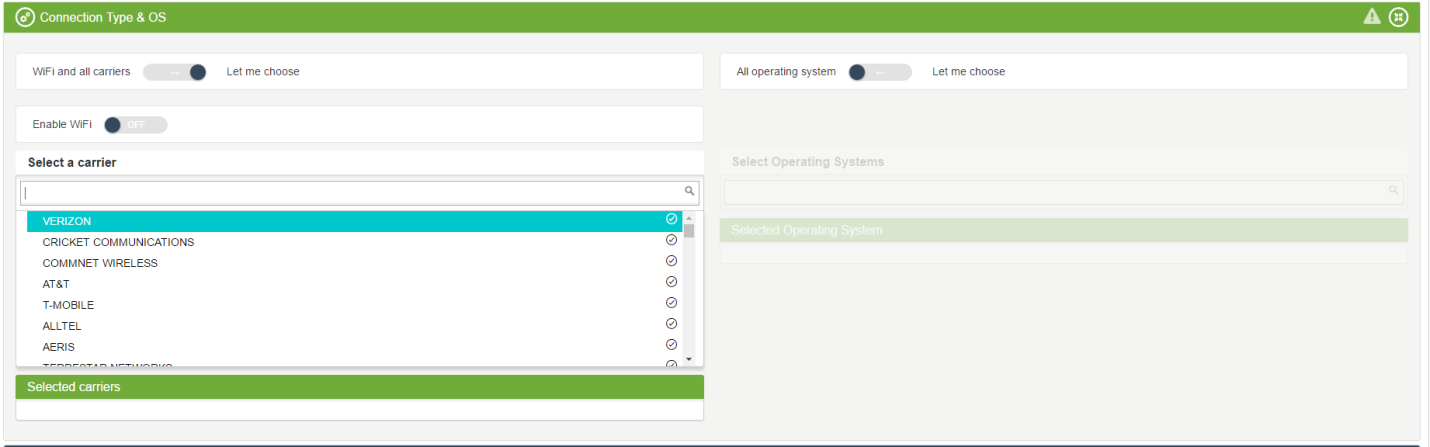
Target a Country, a Connection Type, and OS if you need to.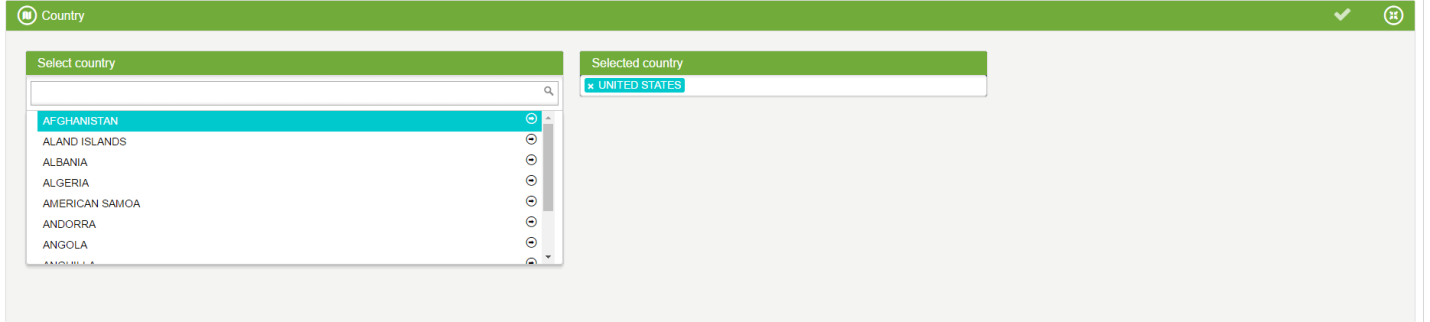
Add your Creatives, Ad Tag or Vast file.
In the budget section, you have the choice between Manual CPM bidding and Optimized CPM.
If you choose optimized, you will be using our in-house algorithm.
Our algorithm is built to reach a performance goal which can be CPA, CPI or CPC. It programmatically adjusts the CPM and blacklists placements which are not performing.
If you choose CPA optimization, you have to implement our conversion tracking pixel.
Check the detailed informations here.

ADVANCED SETTINGS
The Advanced settings fields are straight forward; note that the optimization strategy will only be available if you run with the optimized spend.
Check the detailed informations here.
CUSTOM SETTINGS
In Custom targeting, you can create a list and include or exclude it from a campaign.
Lists can be added by placement, IPs or device id.
Click on Create list, select a type of list and add it by uploading a file or copying the list in the text box.

Save and Activate your campaign.
It will be reviewed by our audit team. You will receive an email notification once the audit is done and the campaign has started. We usually audit creatives in less than 24h.
5 REAL TIME REPORTS
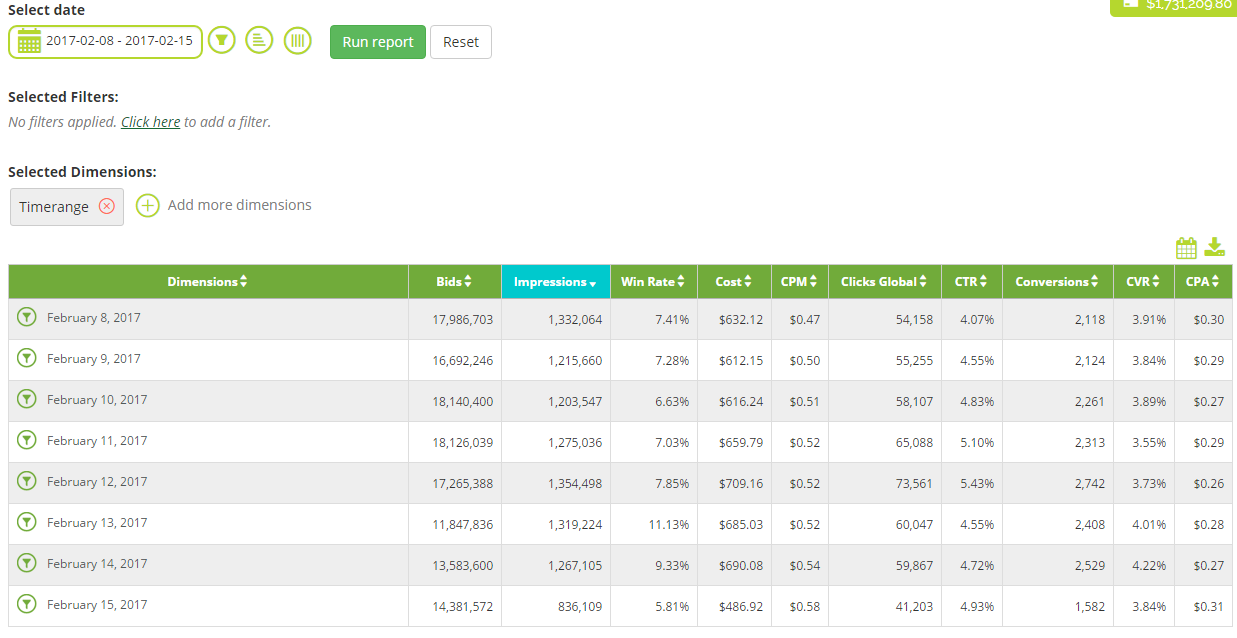
To analyze the performance of your campaign go to Reports> Real Time Reports.
Bucksense report displays data in real time and it is multidimensional.
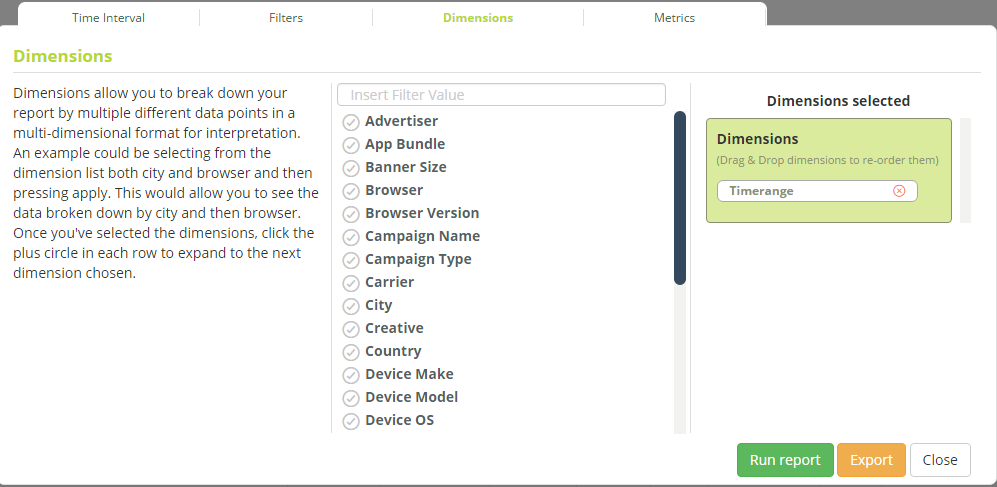
From here, filter the data, add dimensions and reorganize them.
Check the report directly in our platform or have it sent to your email as an excel data table.
If you want to receive the data in your system, you can also connect to our API.
In the online version of the report, create placement lists and attach it to a campaign.
You can also edit the CPM per placement for manual CPM campaigns.
Check more information about how to create lists and edit microbidding rules from the report.