
Offers refer in general to products, services or specific brands. For example, an offer could refer to a product for sale on an E-tailer site (i.e., a book on Amazon site). Offers contain the basic information that is needed to set up the campaigns attached to them and track their performance.
Offers
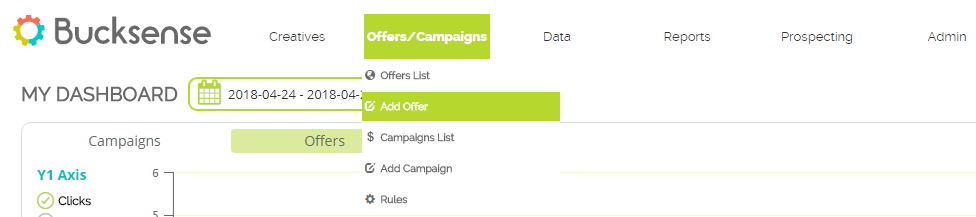
1. Click Offers&Campaigns tab and select from the dropdown menu Add Offer.
2. Select the Advertiser. If any advertiser has been created yet for this offer, you can add a new one from Advertiser Management.
3. Name your Offer and add the Landing Page URL. Landing Page Url should be the tracking link for your campaigns or one of your tracking links. How to add additional Landing Pages URL/ Tracking Links is explained below.
4. Choose the Conversion Tracking Method you want to implement in your campaigns: Server to Server Postback, Pixel tag or None. This is how the conversion notification will be communicated to Bucksense platform. To learn more about Tracking please click here.
5. Set a Start date and an End date (optional) for your offer and select a reference Timezone from the dropdown menu
Once you have saved this information, new sections related to the Offer Details and advanced tracking will appear to be edited.
Basic Settings
Offer Detail
Cap Settings Daily and/or Total for Impressions, Clicks and Budget can be added in the related fields.
- Impressions: this is the maximum number of Daily/Total ad impressions that are allowed to be served for your Offer
- Clicks: it defines the maximum number of Daily/Total clicks for your Offer
- Budget: set the Daily/Total budget for your Offer

The campaign(s) associated with your offer will be paused as soon as one of the Offer cap is reached.
Please note that if you also set cap(s) in campaign settings (see here), the campaign will be paused when the lowest cap among the ones which have been set is reached.
Example 1. You added an Impression Total cap of 20000 to Offer settings. The associated campaigns (A and B) have 7000 and 8000 Impressions Total caps respectively.
The campaigns will be paused as soon as the 7000 and 8000 impressions will be delivered in the campaigns.
Example 2. You added a Click Daily cap of 20000 to the Offer settings. The associated campaigns (A and B) have respectively 25000 and 30000 Click Daily caps.
The campaigns will be paused as soon as a total of 20000 clicks will be delivered in the campaigns (regardless of the distribution between the campaigns).
Events
Events allow you to track additional user’s interactions within Advertiser’s site. In this section, you can create custom events associated to the offer and see the events that belong to the advertiser.
To create events at the Advertiser’s level, please click on Advertiser Management.
For further details on Event Tracking, read here How to track multiple postback Events article.

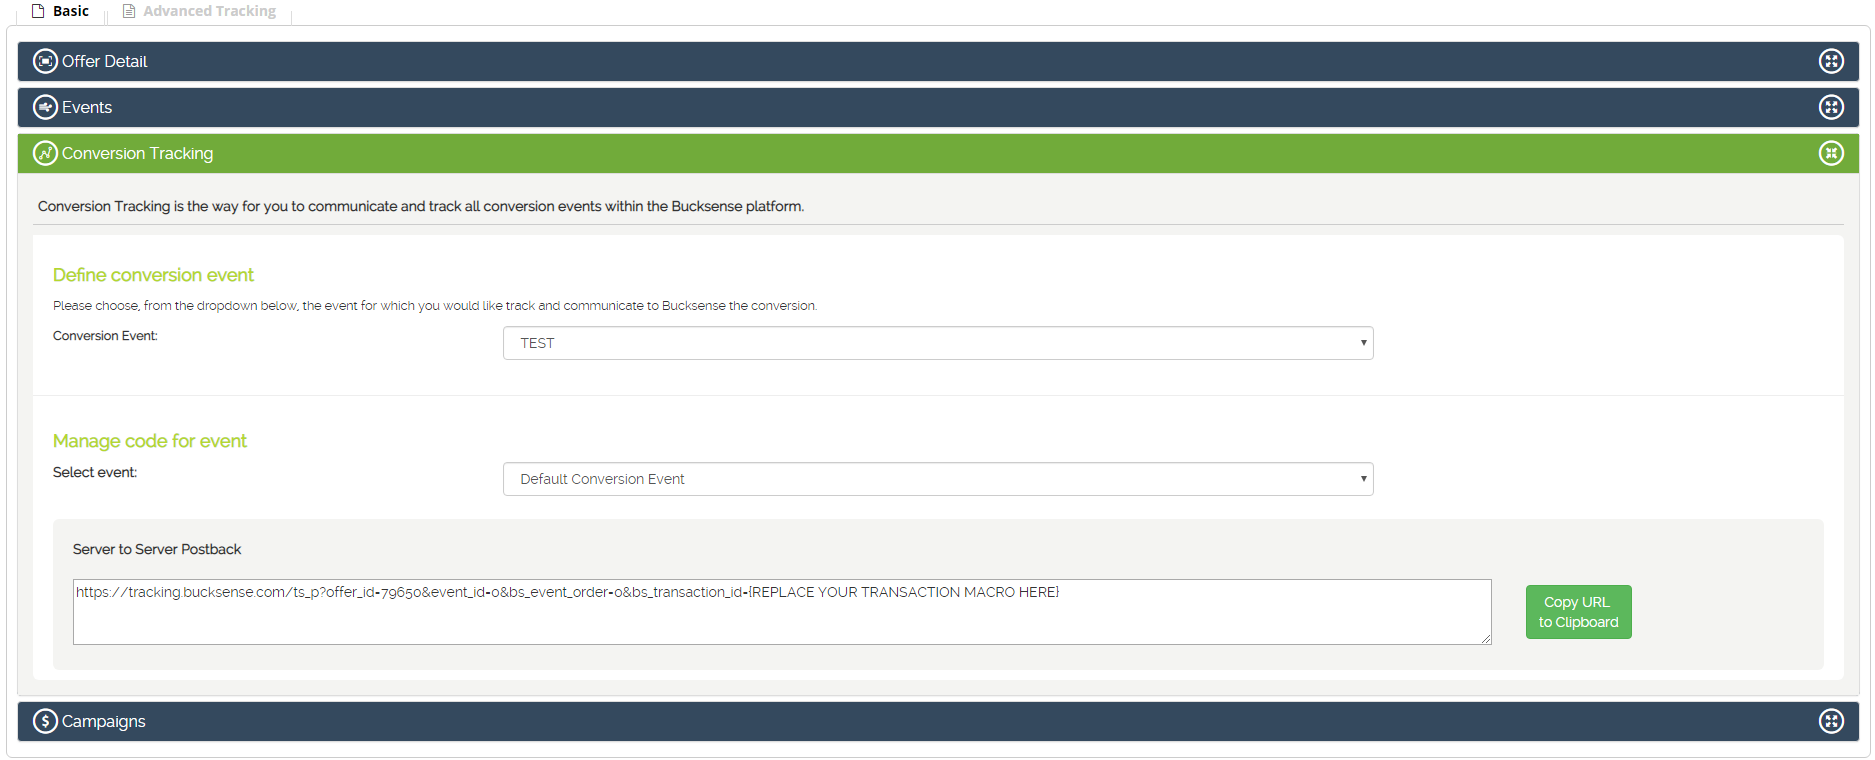
Conversion Tracking
In Conversion Tracking you can select the conversion event for the offer: default conversion event or any of the offer events set up in Events section. Once selected the conversion event, you can generate the Offer-based Pixel that you need to implement in Advertiser’s system or site to track conversions.
Our Guide for Conversion Tracking provides more information on Pixel implementation in Advertiser’s system.
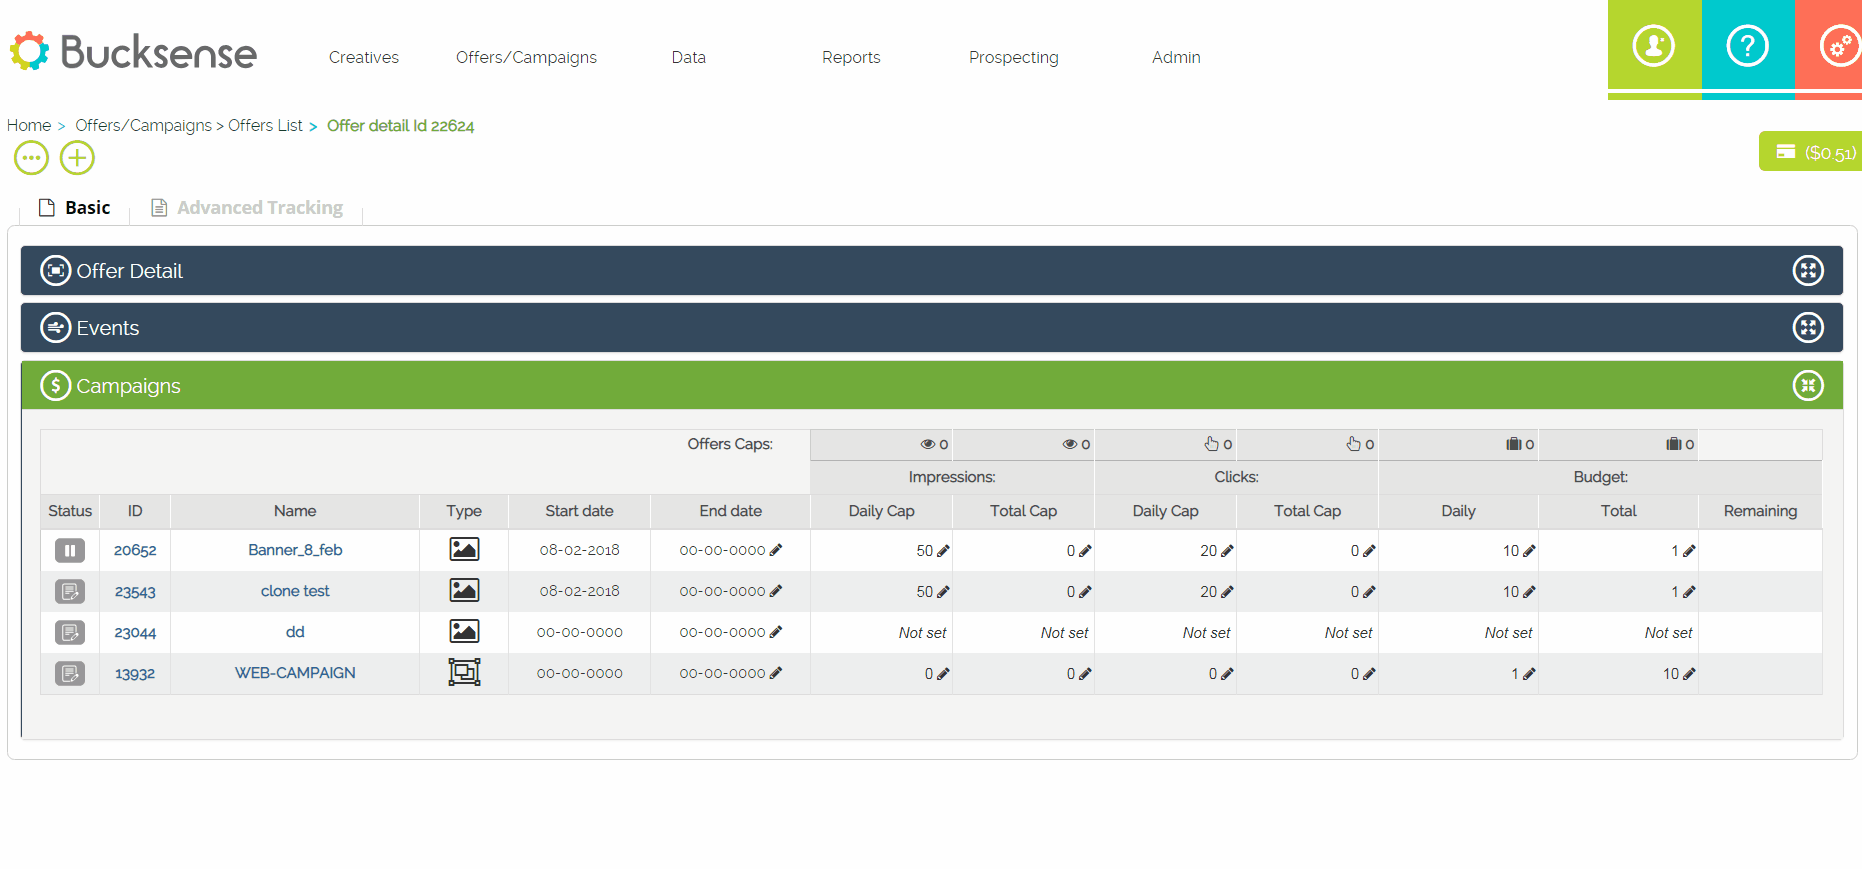
Campaigns
This section lists all campaigns tied to the offer that have been created.
You can access them from here or on Campaign List below Offers/Campaigns Tab.
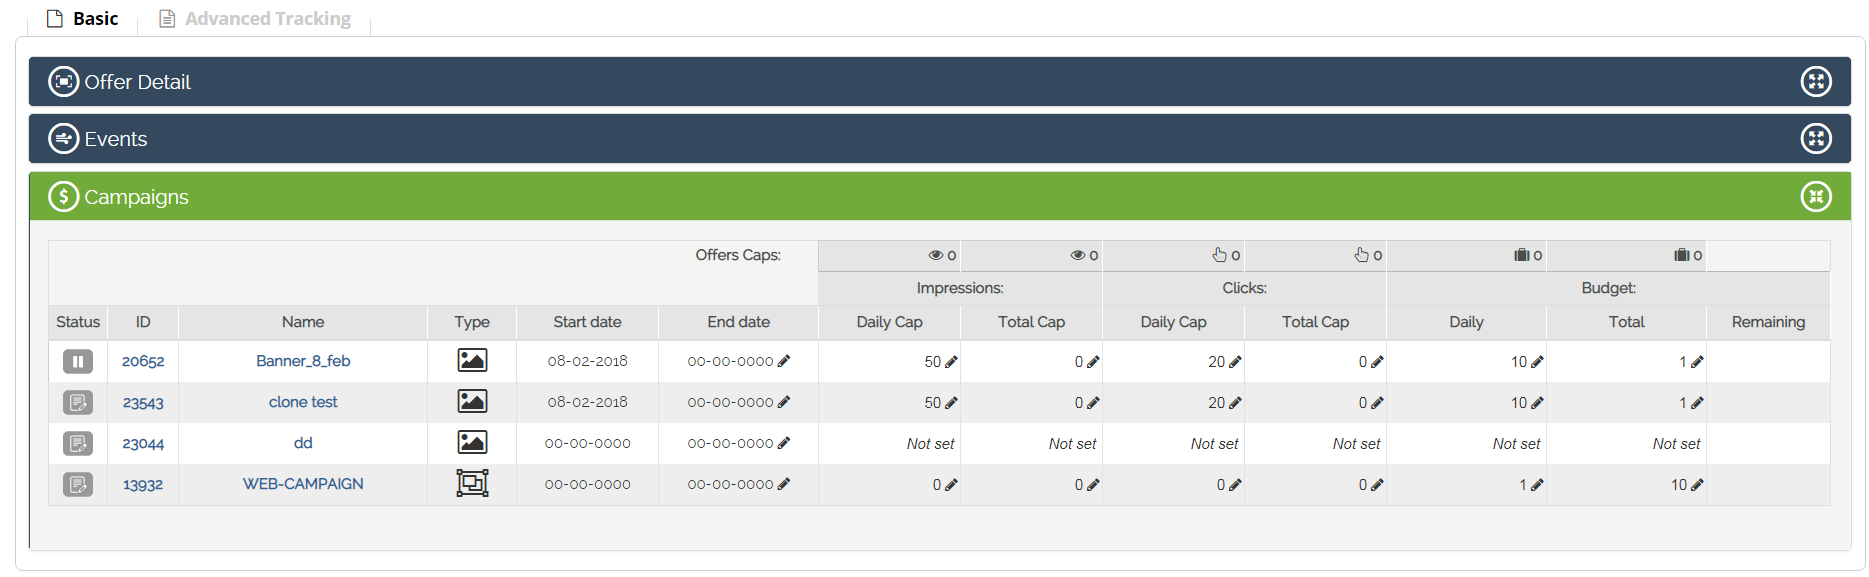
You can easily check and edit: the Status, the End Date and the caps of the Impressions, Clicks and Budget of your campaign(s).
Clicking on a campaign name to access the campaign settings.
Advanced Tracking Settings
Additional URLS
In this section, you will able to include all the URLs that can be used as Tracking Links/ Landing pages URLS in the campaigns that belong to this offer.
- Go to Additional URLS section and click on Add more URLs to your Offer.
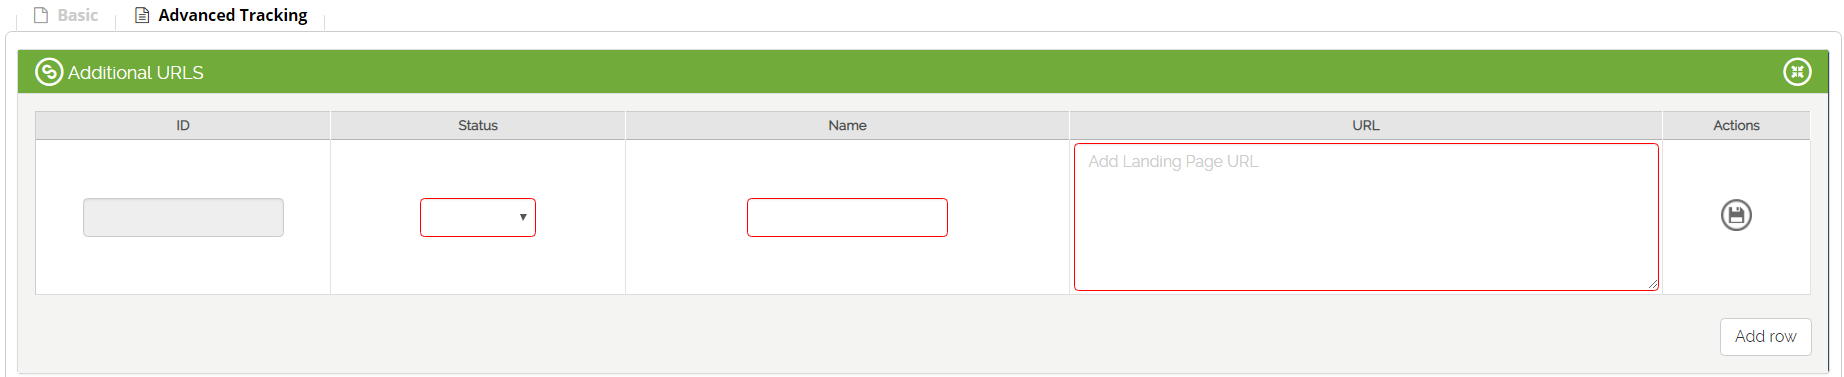
- Name this new Landing Page URL in a way that helps you to search and identify it easily for campaign setup and report analysis.
- Enter the URL, select Status Active and Save.
- Hit Add Row button to include more additional URLS
Offer URL A/B Testing
Offer URL Rotators help you to test multiple landing pages at the same time to find out the best performing ones and enhance campaign results.
Learn more about how Offer URL Rotator works here.
Frequency Capping
in this section you can choose whether to set the Frequency Cap in the offer and apply it to all its campaigns or set a specific Frequency Cap in each campaign you will create using this offer
- Campaign
By selecting the Campaign option, you will not have to add any Frequency Cap settings at this stage, but you will have to do it during the campaign creation, by adding your settings in the Advanced Targeting section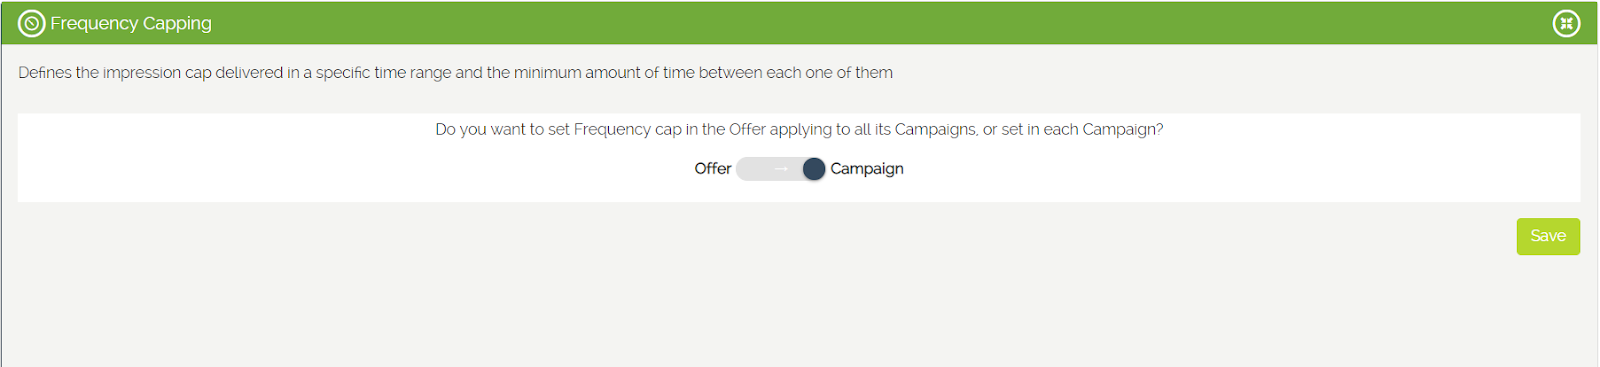
- Offer
The Offer option allows you to add the Frequency Cap settings at this stage, so that these will be automatically applied to all the campaigns you create for this offer (you won’t be able to edit them in your campaign settings)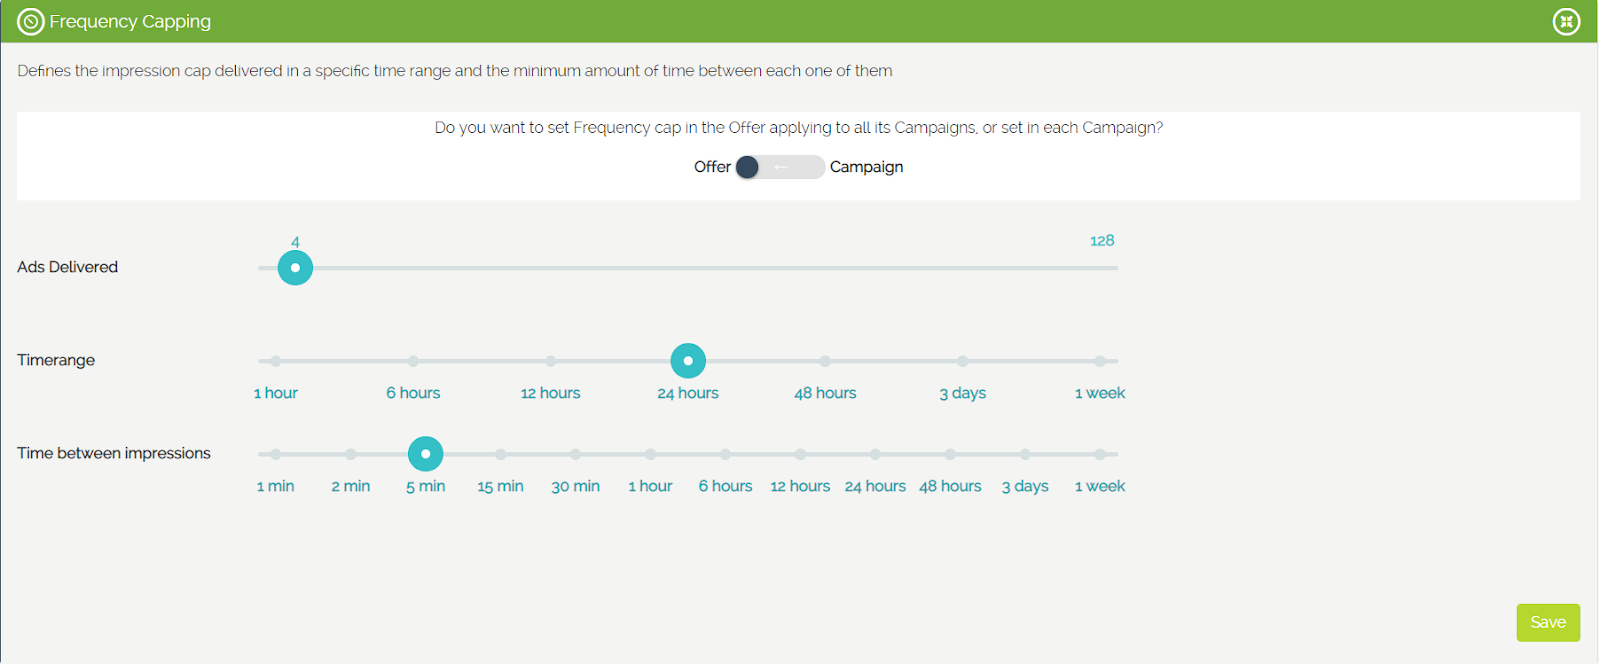
Rules can be created for the following:
- Ads delivered: defines the number of impressions a single user can see (choose a value between 1 to 128)
- Timerange: set the time range in which impressions will be shown to the user (1 hour, 6 hours, 12 hours, 24 hours, 48 hours, 3 days, 1 week)
- Time between impressions: defines the minimum time between the delivery of impressions (1 minute, 2 minutes, 5 minutes, 15 minutes, 60 minutes, 1 hour, 6 hours, 12 hours, 24 hours, 48 hours, 72 hours, 1 week)
The values for an optimal setting of number of impressions, time interval and minimum time period between each impressions, depend on your campaign goal.
Bucksense recommends to set a frequency cap of 4 Ads Delivered, Timerange 24 hours and Time between Impressions of 5 minutes.