
Bucksense custom targeting allows you to create and manage Lists so you can target audiences that you know are likely to convert.
How to create Lists
Follow these steps to create a new List:
- Click on Black/White List below Data tab

- Click on
 to add a List
 - Select an Advertiser, add a List Name and Select a list type
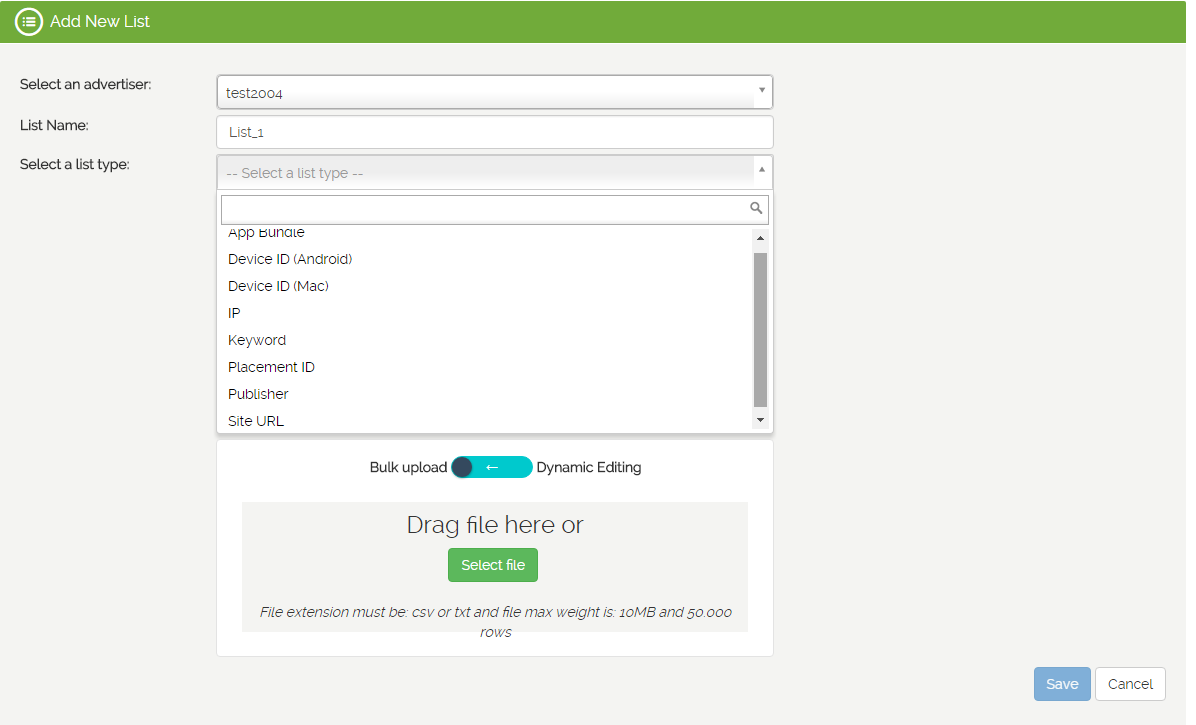
- You have the choice to either: Bulk upload or Dynamic Editing
- Bulk upload allows you to upload a csv or txt file (max weight 10 MB) containing your list. This option is recommended for Device ID or Placement ID lists (be sure to properly include all values in the Placement ID, especially for those that start with 0)
- By selecting Dynamic Editing you can manually type your single items into the text area using the slide bar. This option is usually used for lists that need to be frequently updated like ‘App bundle’; list can have maximum 1500 records with “manual” upload, while API upload limit is 10000 records
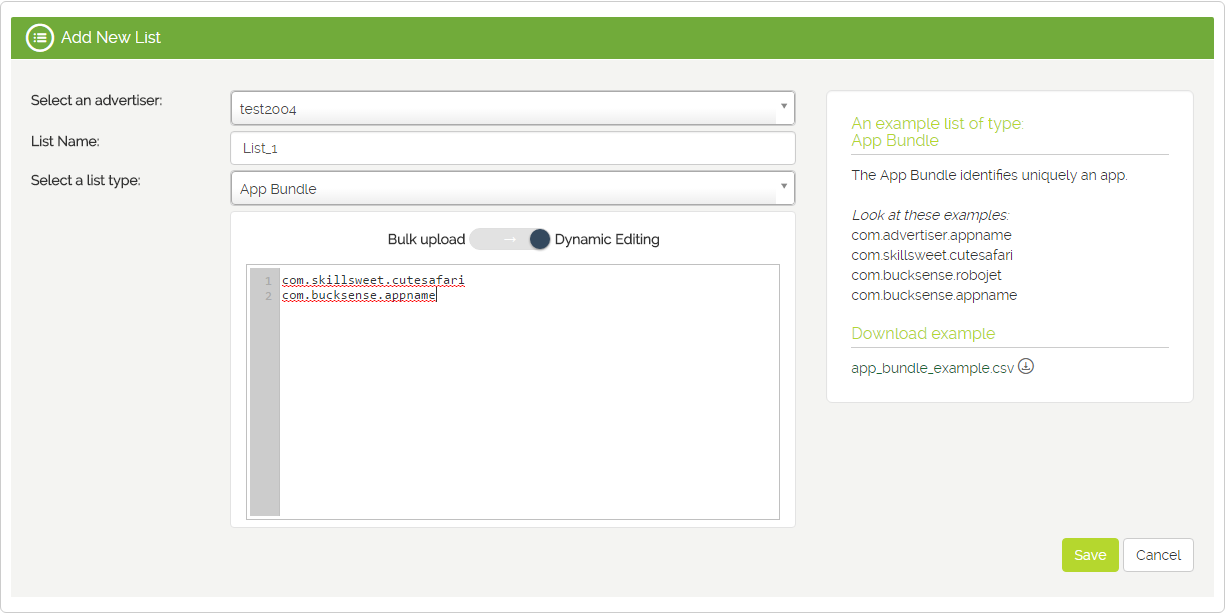
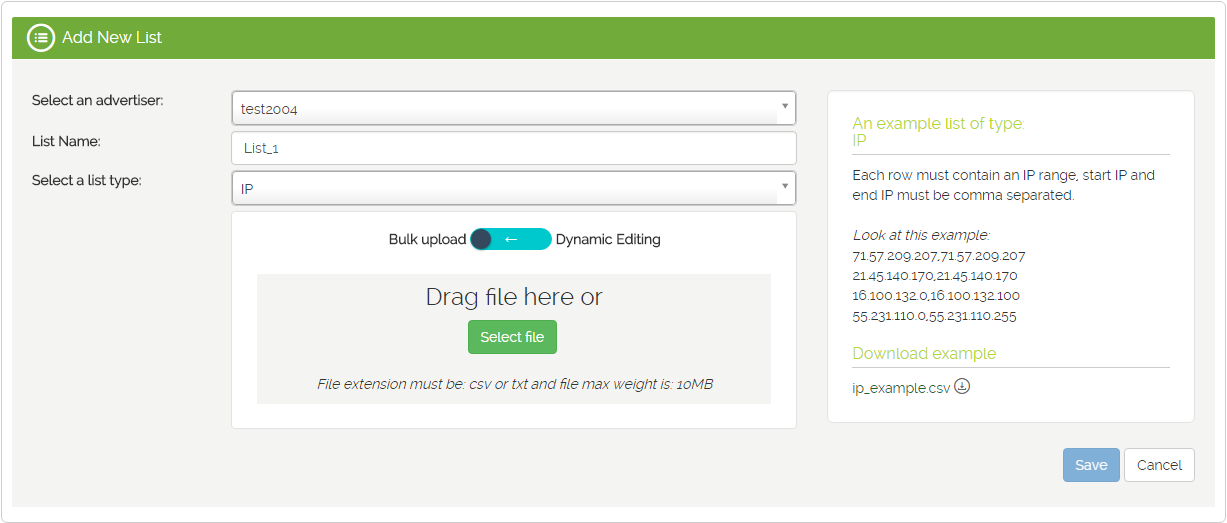
Depending on the list type you have selected, you will need to include the items in the list, as in the samples below:
App Bundle: the App Bundle which identifies uniquely an app. e.g. 1193508329 for iOS APP and com.bucksense.appname for Android
Device ID IFA: the Identify For Advertisers is a temporary device identifier used by the Apple set of handheld devices e.g. 22A29C48-BEA1-4758-B9E5-E661B46C08E9
GEO: format for this type of list is: latitude, longitude, radius (where the radius is in meters). e.g. 41.892986,12.438239,5000.
If you want add a GEO list using a csv file, you need to insert latitude, longitude and radius in 3 distinct columns.
Keyword: a list of specific keywords, that are relevant for your offer/product, inside web/mobile web Site Domains and URL parameters. For example, if you sell footwear, you could create a list including keywords like sneakers, thongs, boots, loafers etc. In this way your ads will be displayed in sites that include these words in their URLs
IP (not allowed for Google campaigns): an IP range (start IP and end IP must be comma separated) e.g. 21.45.140.170,21.45.140.170
Publisher: a list of Publisher IDs e.g. 1100004890, 1108e128591811e295fa123138070049
Placement ID: each Placement has its unique identifier (you can find it in the reports) e.g. 152324f2a35111e291c11231312559e4
Site Url: a list of valid domains e.g. textnow.com, www.textnow.com, http://textnow.com,
https://www.textnow.com
Web user id: User Id identifies uniquely a user in a web site (like cookies)
Postal Code: a list of valid zip codes e.g. 00124, 00119, 00126, 00135.
See here the list of countries for which we support the Postal code list
How to edit Lists
You can always access and edit or remove the lists that you’ve created by clicking on List Management below Campaigns Tab.
You can quickly see details as Name, Type and Upload Method you’ve used for that list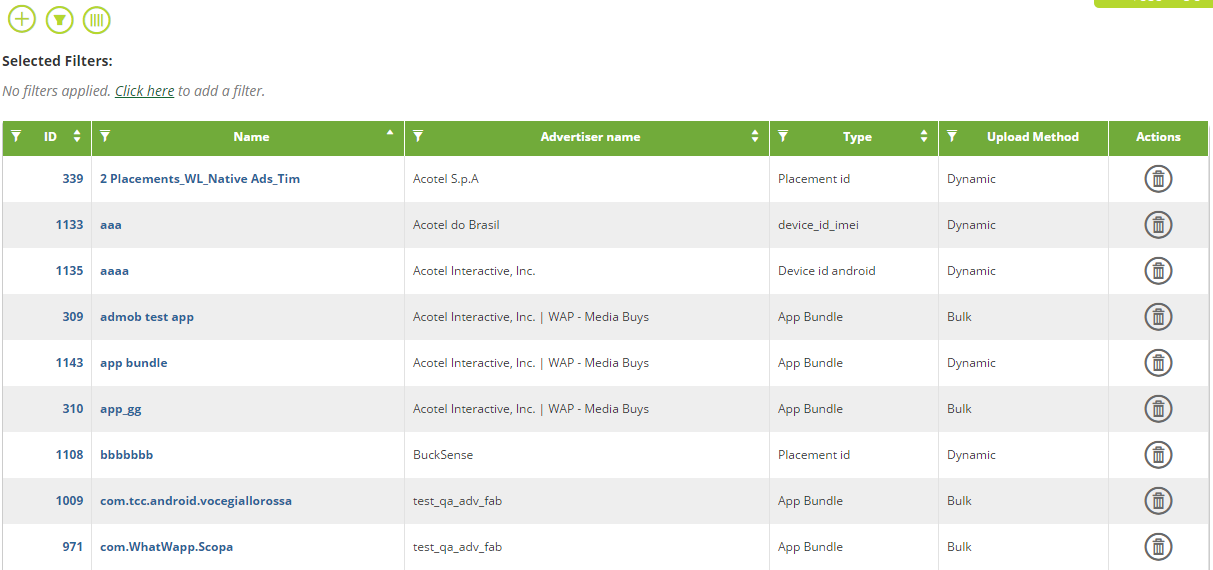
If the List you have selected is Dynamic, you can easily Add Rows or remove Current Rows, using the appropriate fields.
Click on ![]() to download an Excel file containing the items of your List.
to download an Excel file containing the items of your List.
At the bottom of the page you can see the Campaigns associated to that List.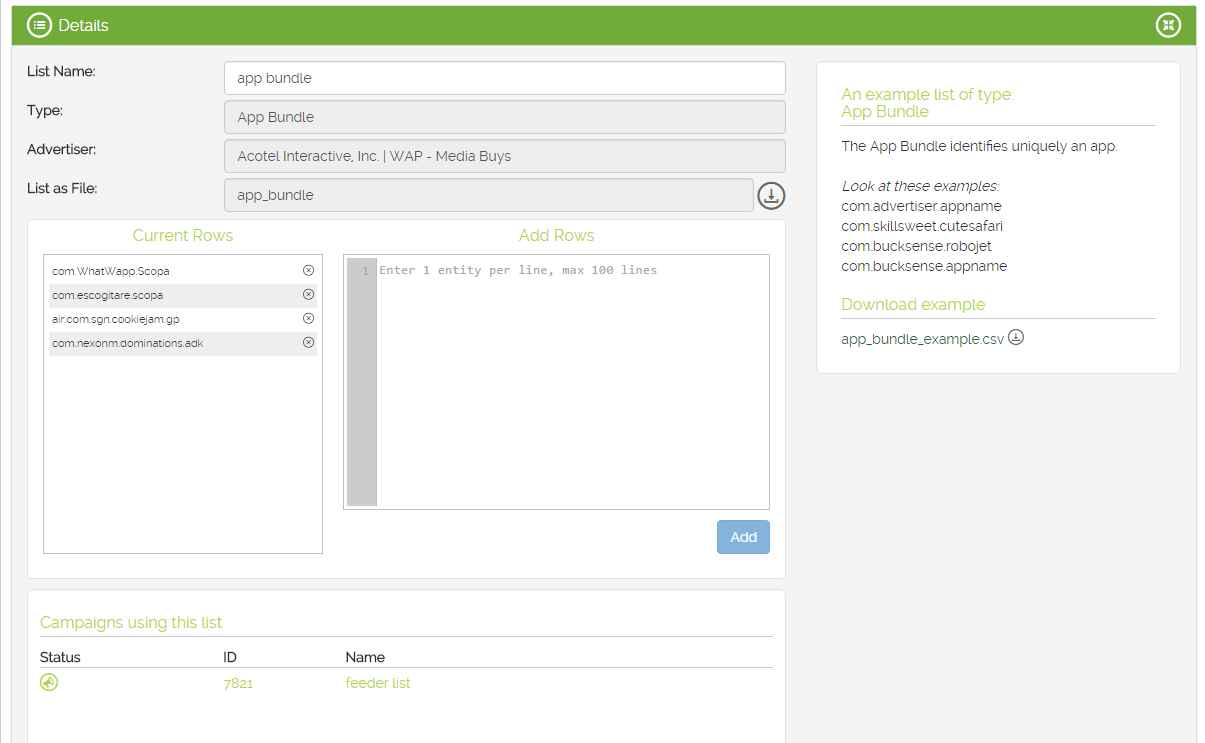
If you have accessed the details of a Bulk list, you can click on ![]() to download the CSV file.
to download the CSV file.
Use the Change your file button to update a new CSV or txt file.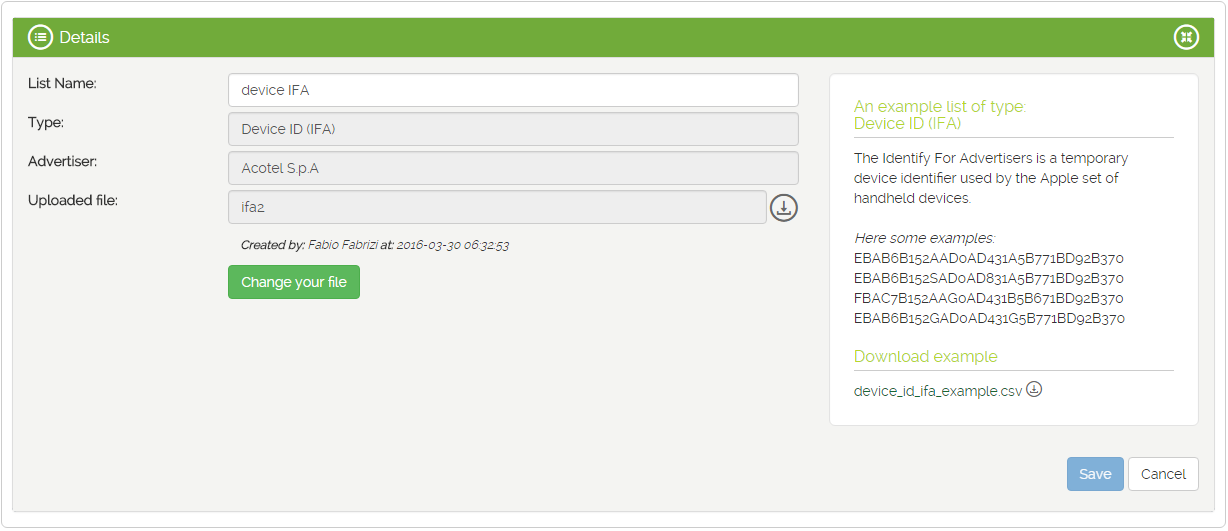
Adding Lists to Campaigns
Once you have created your campaign lists, you can add them to any of your campaigns:
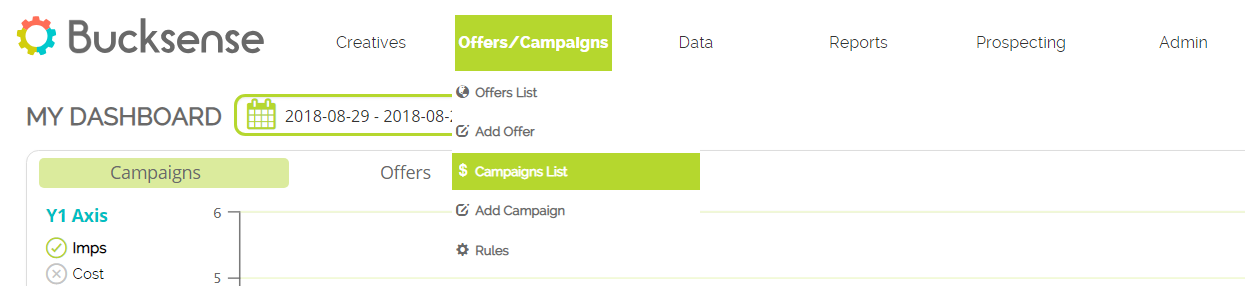
- Click on Campaign List in the Offers/Campaigns tab
- Select the Campaign Name for which you want to add lists
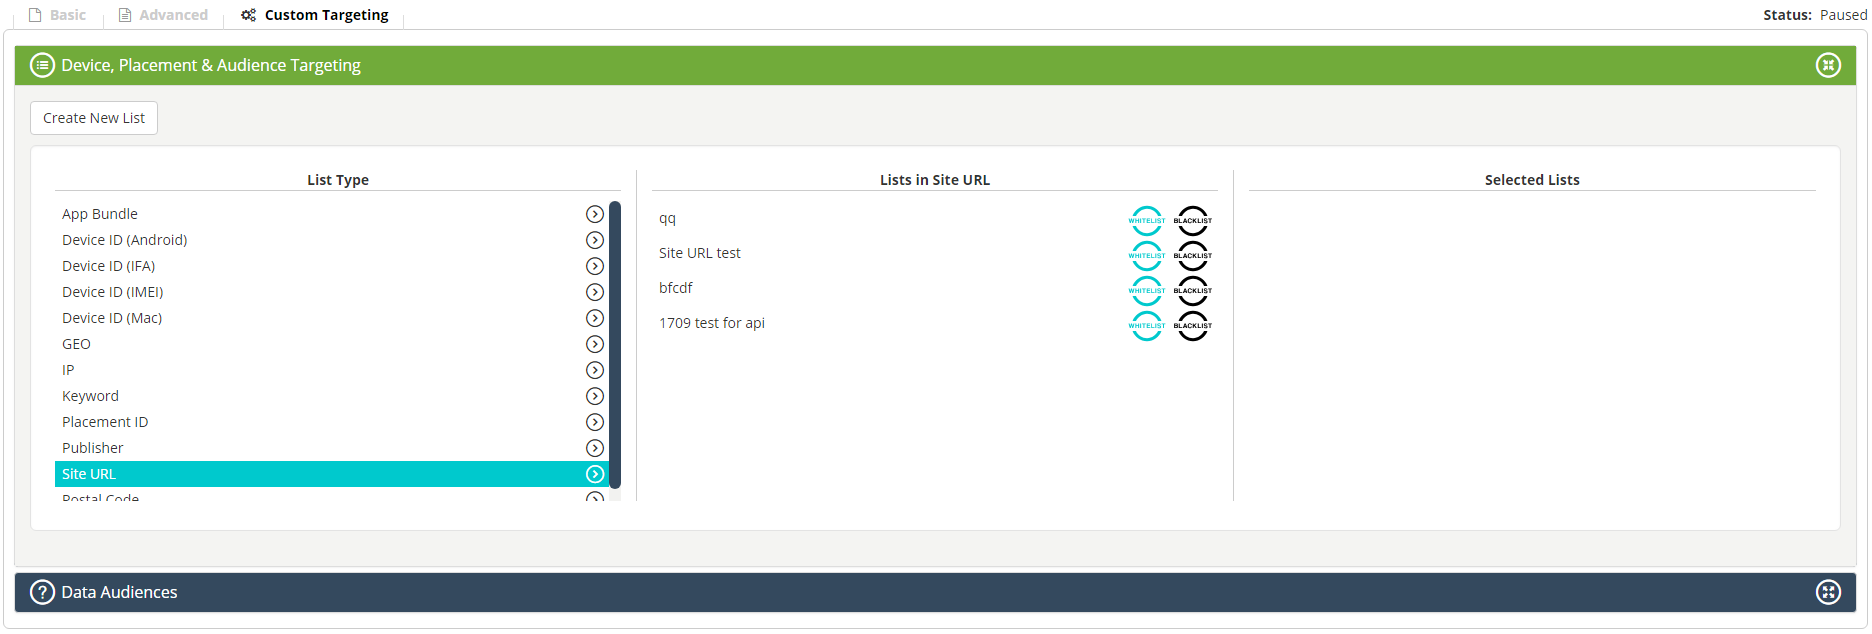
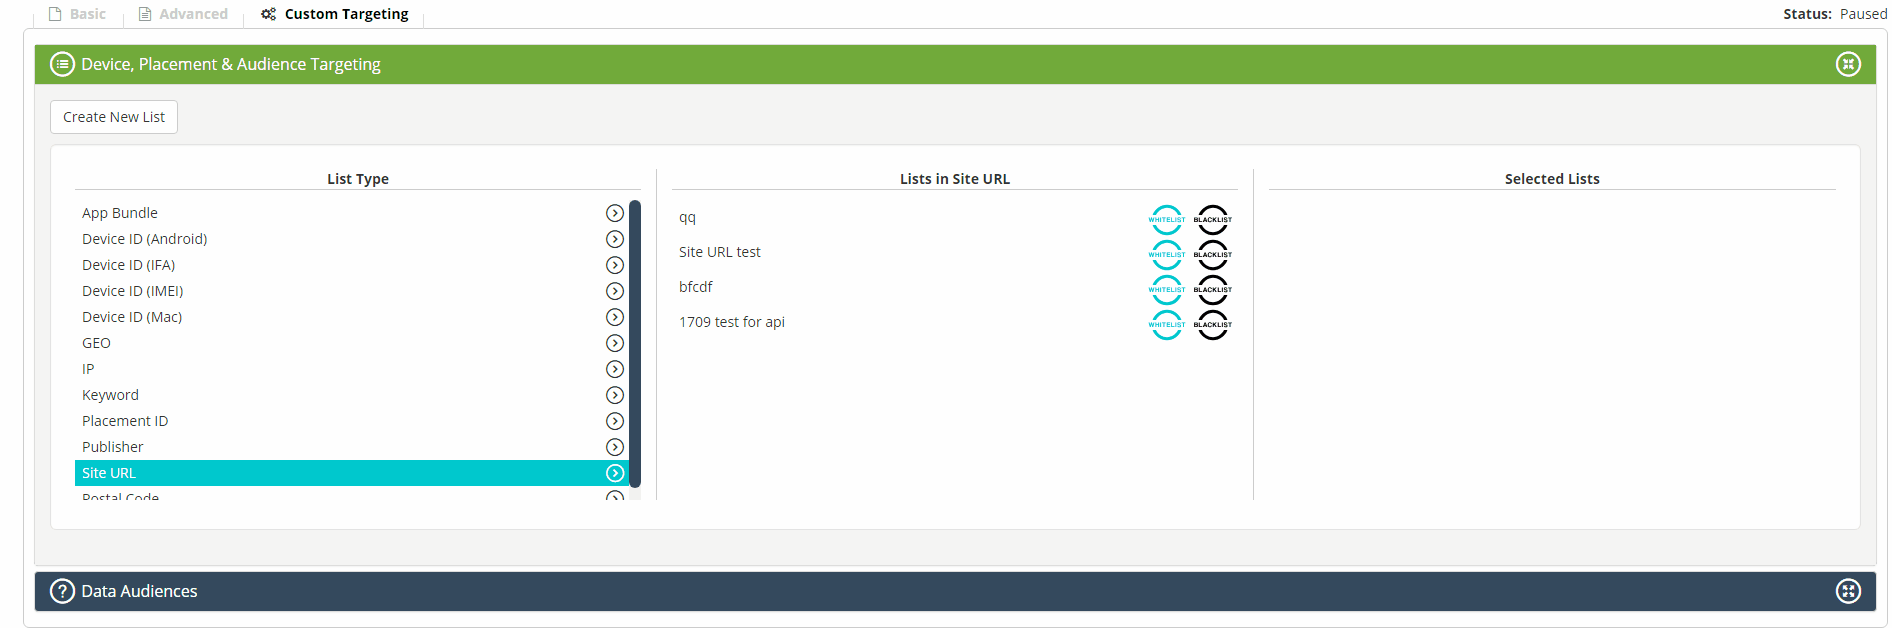
- Click on Custom Targeting and then select Device, Placement & Audience Targeting

- In the List Type column you will see the lists that can be used for your offer (for example, if the offer is for desktop web traffic then the available lists will be IP, Placement ID, Keyword and Site URL).
Click on one of the list types to see the lists you have created. If you have not created any lists, or, if you want to add a new one, click on Create New List button (see details above)
- Click on
 to include a list in your campaign, click on
  to exclude that list.
Please note that if you have 2 or more list of the same type, they will work in OR logic, which means that the list with more items will define the target. If the added list are different (example App Bundle and IP list), they will work in AND logic.
Selected Lists (both included or excluded) will be shown in the last column.
- Click on the Save all button to save your settings or the Activate button to start running your campaign