
Budget & Spend type: Manual vs. Optimized
The Budget & Spend Type section of Bucksense console allows you to choose between 2 spend modes for your campaigns: Manual or Optimized.
Manual
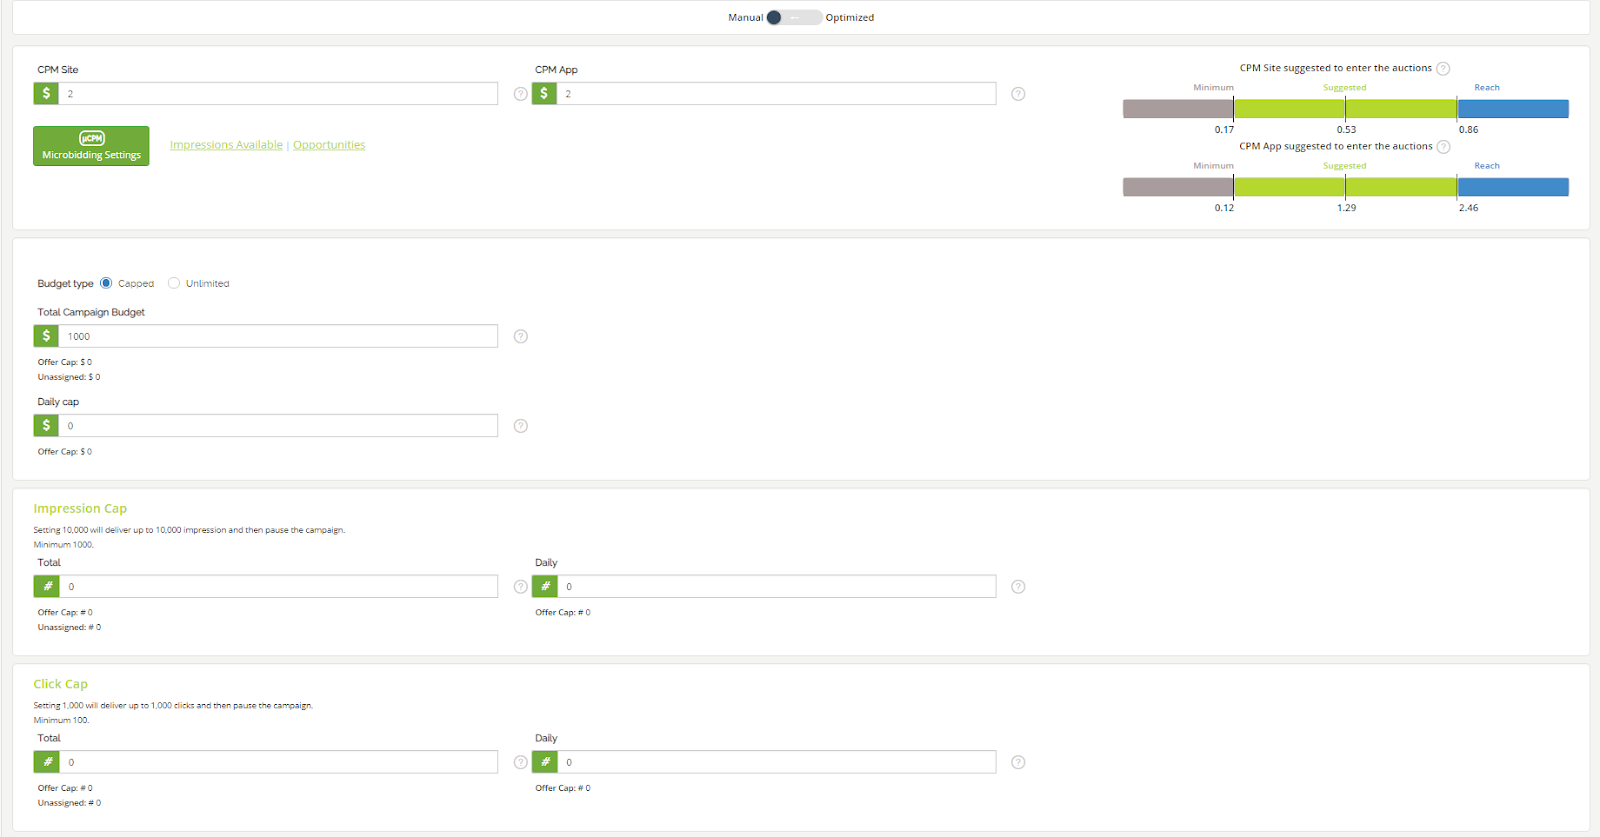
This is the maximum CPM that you are willing to bid through Bucksense for this campaign. On mobile campaigns, you can set the maximum CPM for in-app and site traffic separately.
Choose this option if you want to optimize your campaign manually using data from the Reports section instead of using our smart algorithm for optimization.
You will also need to enter: Budget Type (Capped or Unlimited), Total Campaign Budget and a Daily Cap.
Bucksense helps you to find an estimated CPM starting value by suggesting CPM values.
These suggested CPM values are available for both In-App and Site (depending on your campaign’s Supply Settings ).
These should be considered as “startup” values to access the auctions and are based on matching your campaign settings to the inventory data.
You can also set an Impression Cap and/or a Click Cap (Daily or Total):
- Impression Cap: This is the maximum number of Daily/Total ad impressions that can be served.
For example, if you set a Daily impression cap of 20,000 then no more than 20,000 impressions can be served per day
Minimum value that can be set is 1000 - Click Cap: This defines the maximum number of Daily/Total clicks for your campaign.
For example, if you set a Total click cap of 5000, your campaign will not exceed this number.
Minimum value that can be set is 100.
Optimized
This option represents a dynamic CPM based on the Type of Optimization (CPA/CPI or CPC) and the Optimization Goal you have selected.
The Bucksense Optimization algorithm automatically adjust bids in order to increase impressions that are performing towards your KPI and to decrease/eliminate those that are not. The algorithm performs these adjustments hourly across hundreds – or even thousands – of placements every hour (see here how the Bucksense Optimizer works)
Therefore, this is the recommended option.
You will also need to enter: Budget Type (capped or unlimited), Total Campaign Budget, Daily Cap and Pace (spend as fast as possible or spend evenly throughout the day).
As for the Manual spend type you can also set an Impression Cap and/or a Click Cap (Daily or Total)

Impressions available and Bid Opportunities charts
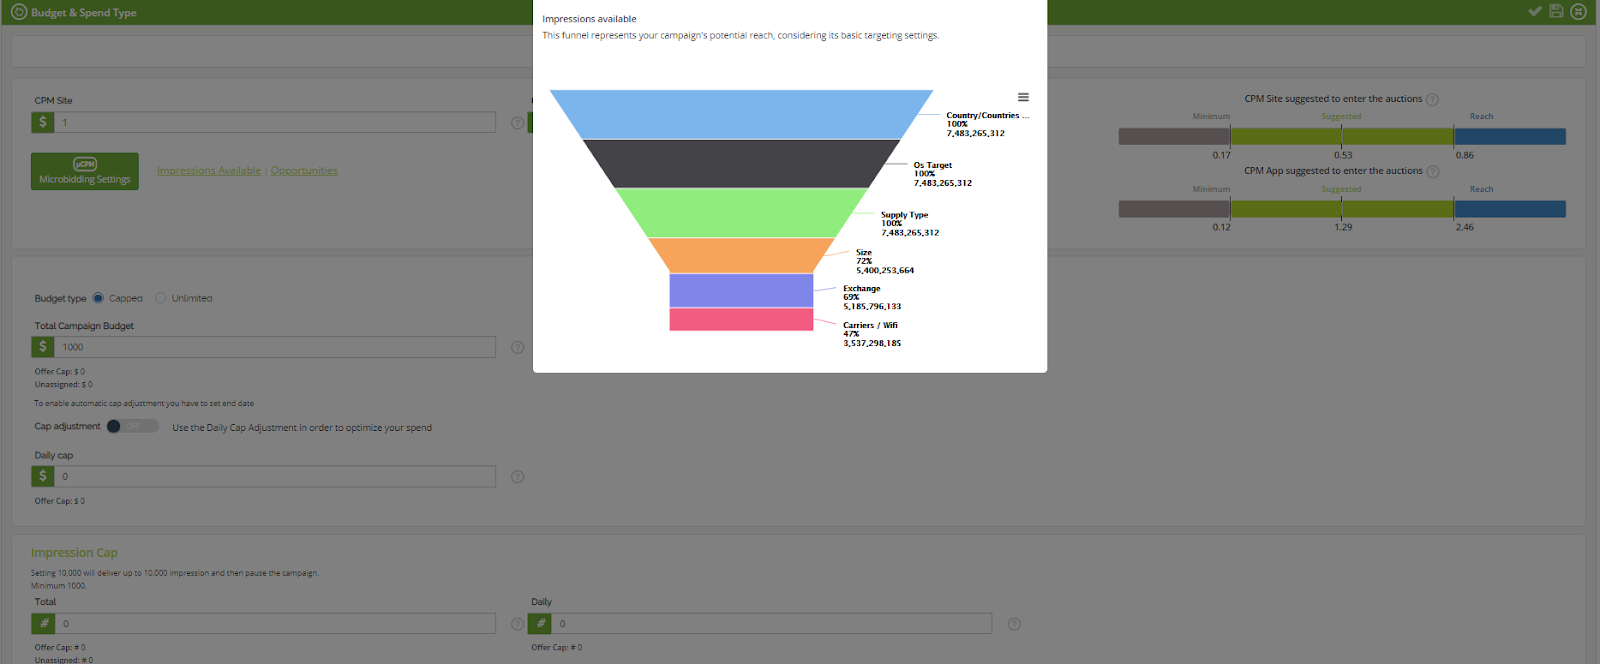
On the left side of the Budget & Spend Type section (available for the Manual spend type) you will find two very useful pop-up charts: Impressions available and Bid Opportunities.
The Impressions available tab provides a funnel chart showing how the available inventory decreases with the targeting settings you entered.
On top of the chart, you can find the country and Campaign type (the funnel chart is available for Creative, AdTag or Video) that you have set.
The funnel chart shows how every targeting criteria decreases the available inventory.
The values in the funnel chart are near real time since they use data from Bucksense’s daily incoming traffic.
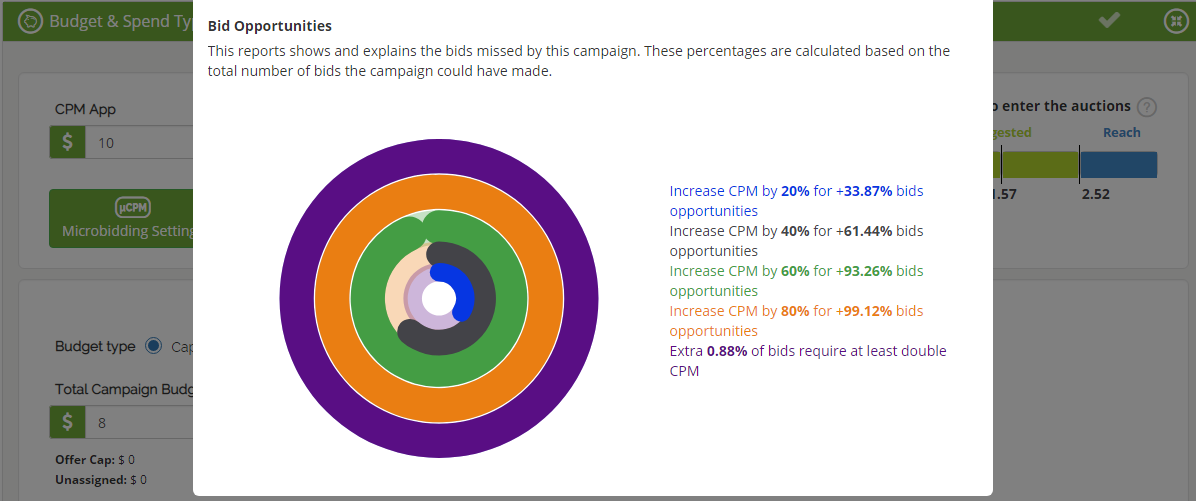
Bid Opportunities tab is an useful chart to check once your campaign is live.
It gives you suggestions about how to increase your CPM in order to increase the number of auctions where your campaign can participate (bids opportunities).
Looking at the sample below, Bucksense suggests to increase:
– CPM by 20% to increase by 5,29% the bids opportunities
– CPM by 40% to increase by 18,94% the bids opportunities
– CPM by 60% to increase by 32,6% the bids opportunities
– CPM by 80% to increase by 76,65% the bids opportunities
Campaign charts
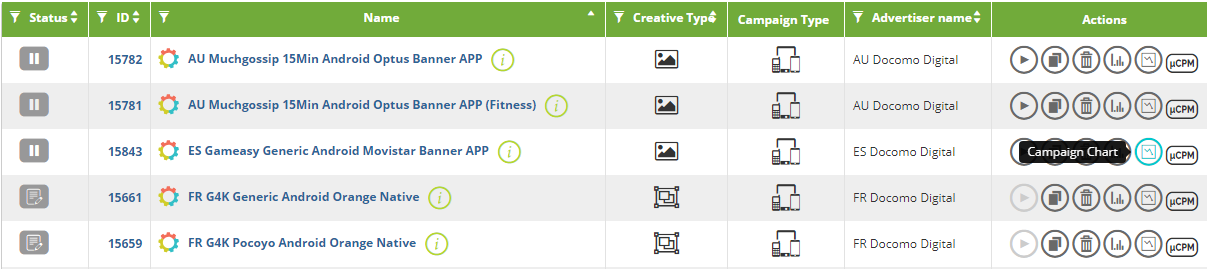
You can easily access a detailed Bid Opportunities chart for the campaigns you are running.
You just need to click on the Offers/Campaigns tab and select Campaign List.
Click the Campaign Chart button for the campaign you want to see the chart
In the pop-up window, select Opportunities tab and you will get a detailed Bid Opportunities chart.
It shows how your bids have performed in the last 7 days and why your campaign bids may have not participated on some available available auctions .
Based on your campaign targeting, there are different reasons for which your campaign didn’t participate to the auctions for the available inventory (bids):
Below Bidfloor (Floor)
Blocked by optimization (Optimized)
Blocked by Microbidding (Microbidding)
Frequency cap (FreqCap)
Blocked by some of the lists (Blacklist)
Blocked by Contextual Peer39 (Context)
Blocked by 3rd Audience (DataAudience)
Blocked by own Audience (OwnAudience)
Video failed targeting (VideoTarg)
Display failed targeting (DisplayTarg)
Bid lost Bucksense auction (Lost)
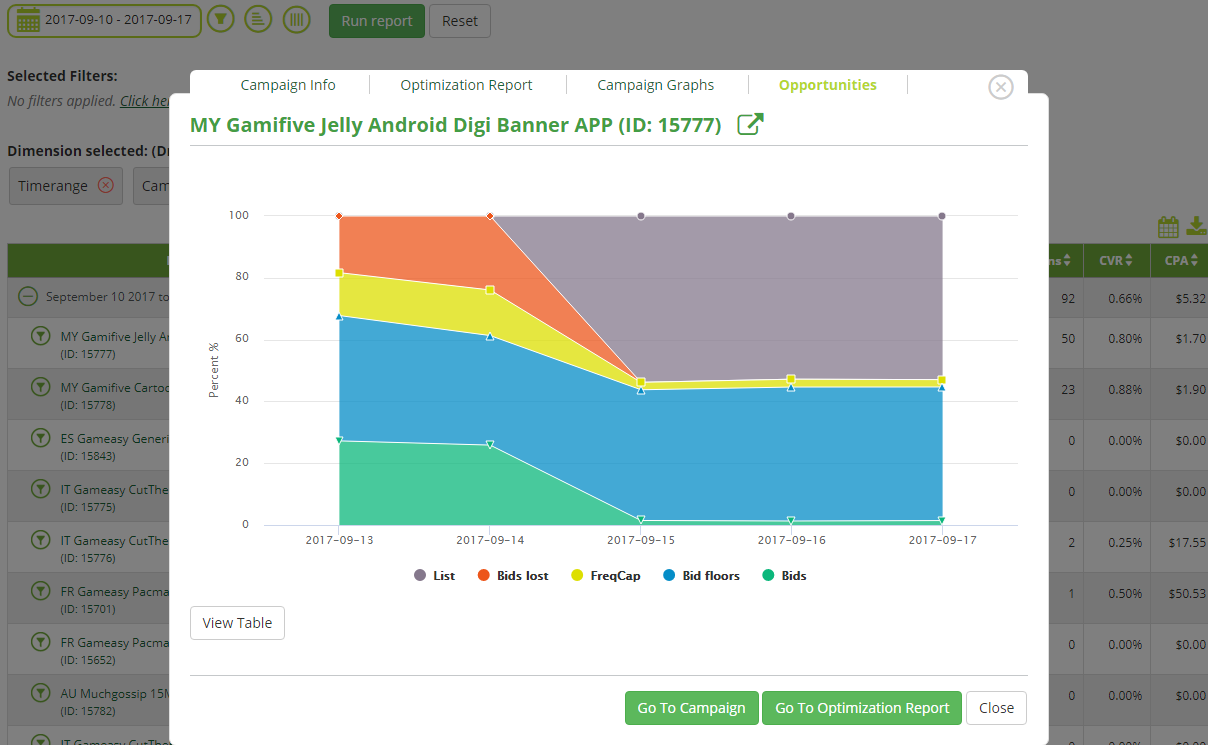
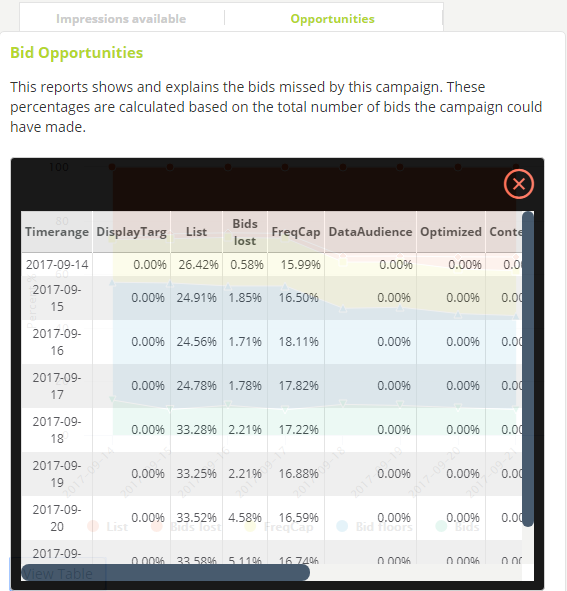
By clicking on View Table button, you will get a detailed table containing all the reasons and the respective % for which your campaign didn’t participate to the auction.
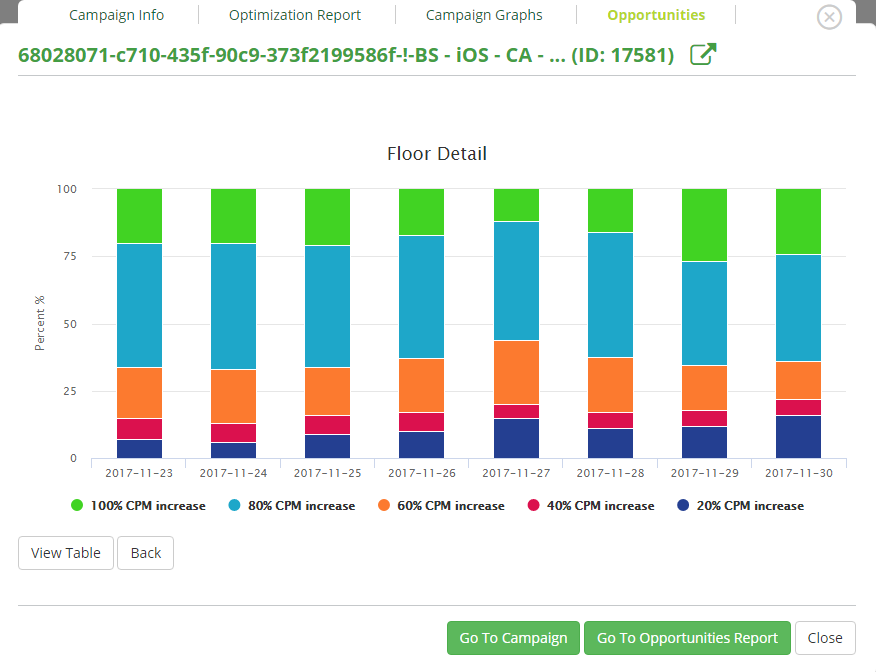
By clicking into the Bid Opportunities chart, you will access a ‘Floor Detail’ chart.
It provides you suggestions about how to increase your CPM in order to increase the number of auctions where your campaign can participate.
By moving the cursor on a specific column, you’ll get info for that specific day.
You can also access the Bid Opportunities chart from the Reports.
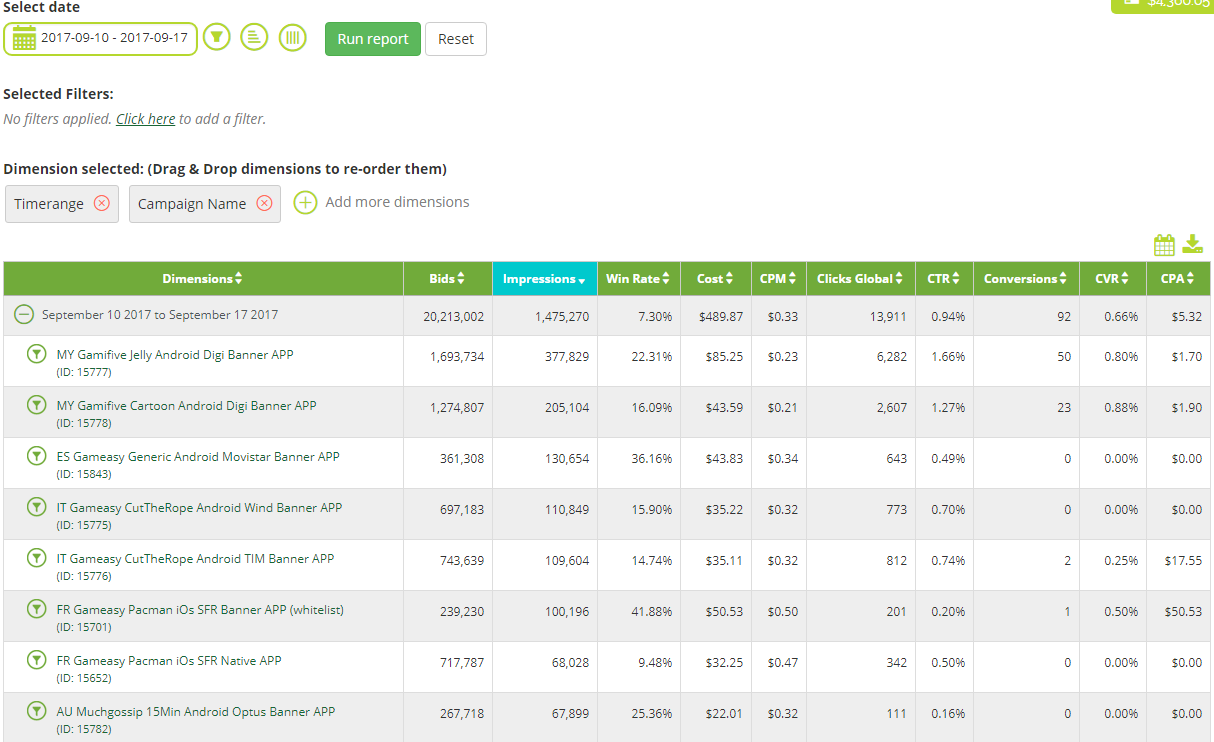
To do this, you need to click the Reports tab and select Real Time Reports

Click on Dimensions ![]() , select Campaign Name and click on Run report button
, select Campaign Name and click on Run report button
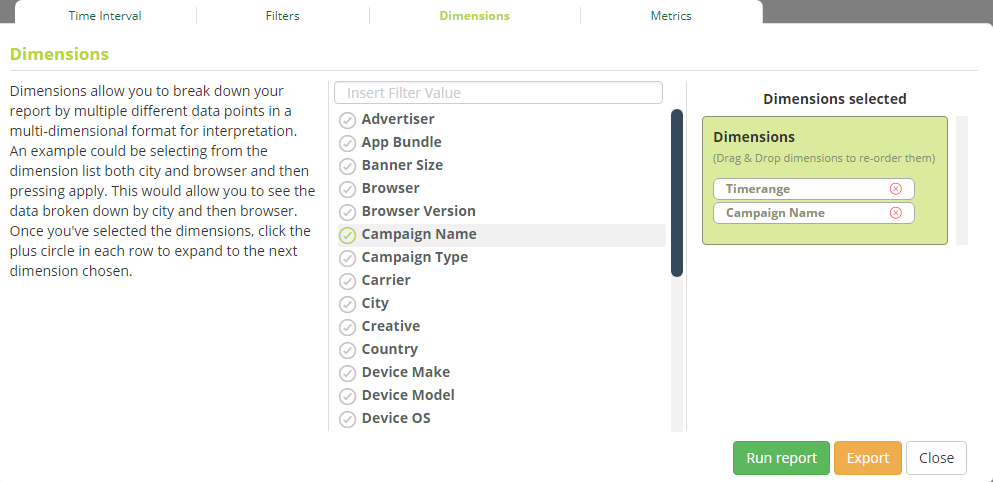
Click on the campaign name for which you want to see the Bid Opportunities chart
Select the Opportunities tab from the pop-up window
See here how to check the Bid Opportunities Report