The Bucksense Bid Opportunities Report provides real-time data on your campaign bids. You can check how your bids are performing and also get useful information on why your bids may have not have participated in certain available auctions.
How to view Bid Opportunities Report
- Click on the Reports tab and select Real Time Reports

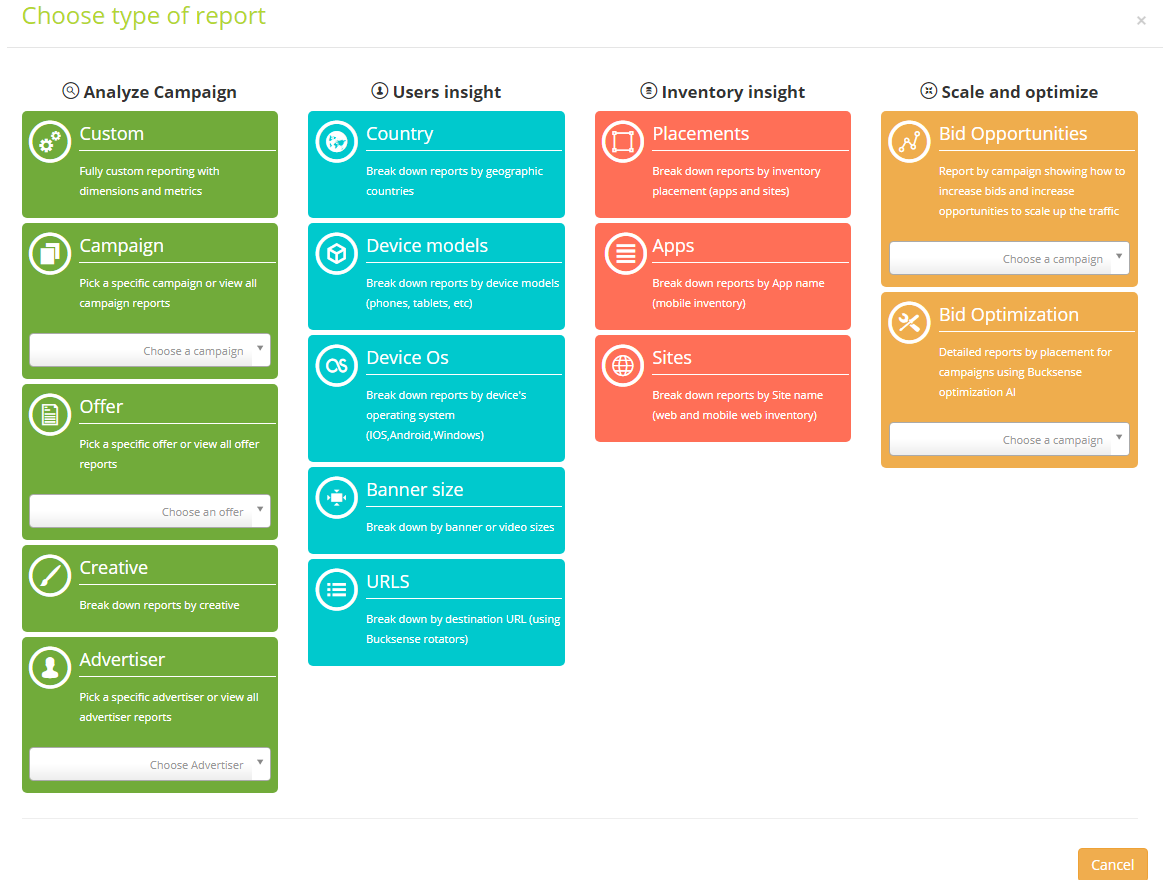
- Choose Bid Opportunities, below Scale and Optimize type of report, as the key variable to customize your report.
Select a specific campaign from the drop down menu, or, leave it empty to get data on all the campaigns you are running.
- Your report displays the selected Campaign, or all running campaigns if you have not selected a specific one as Dimension(s)
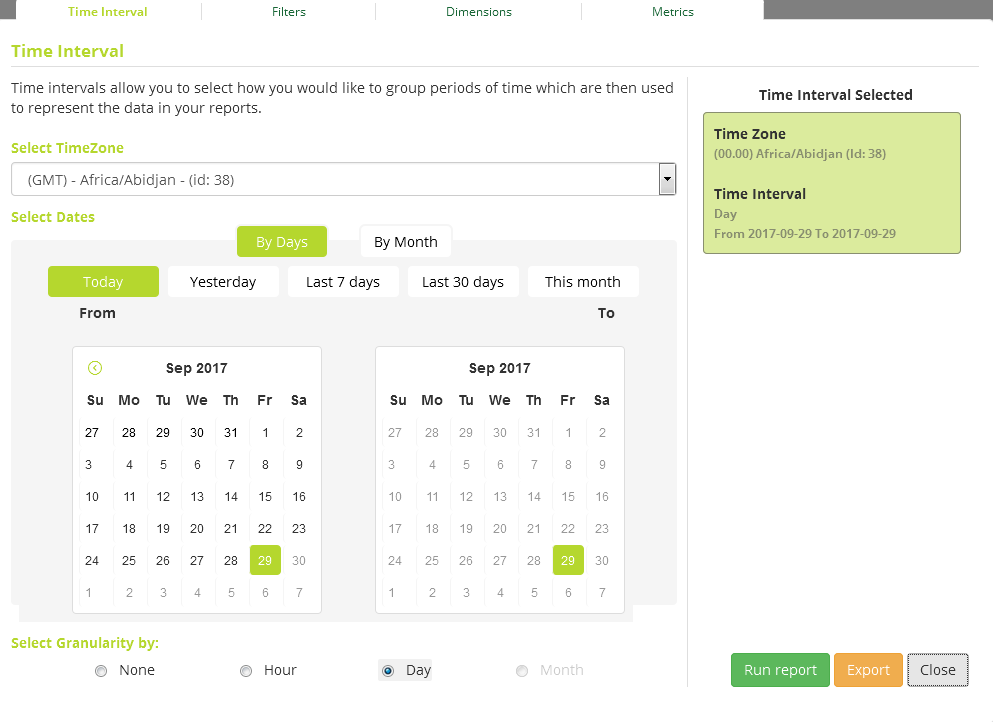
- Click Select Dates to define the period of time and the time zone for your data. Under Select Granularity, choose how you want the campaign data to be displayed: grouped by time interval or by hour, day or month
- Click on
 in the campaign for which you want to see the Placement details.
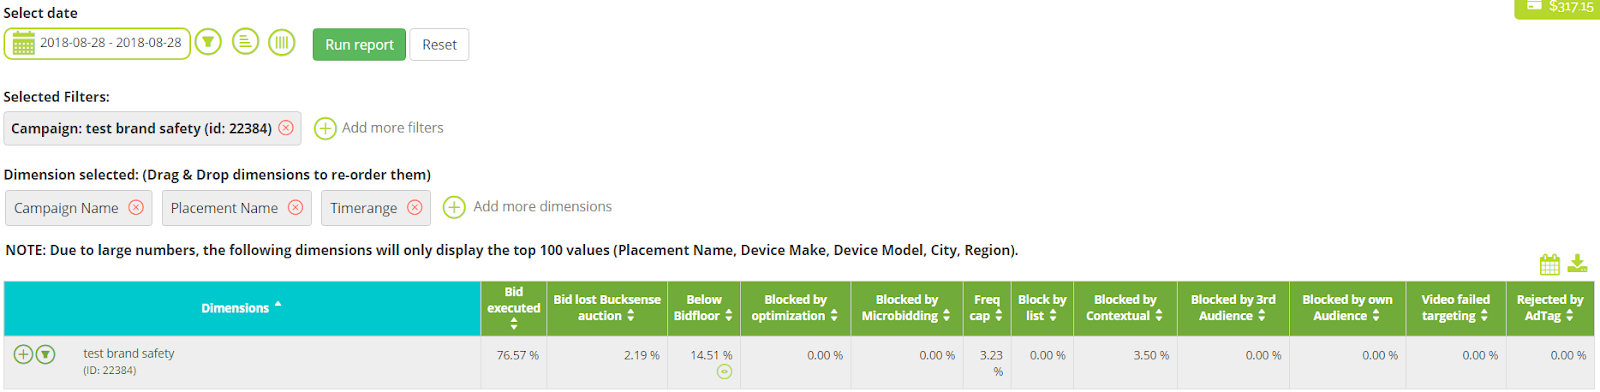
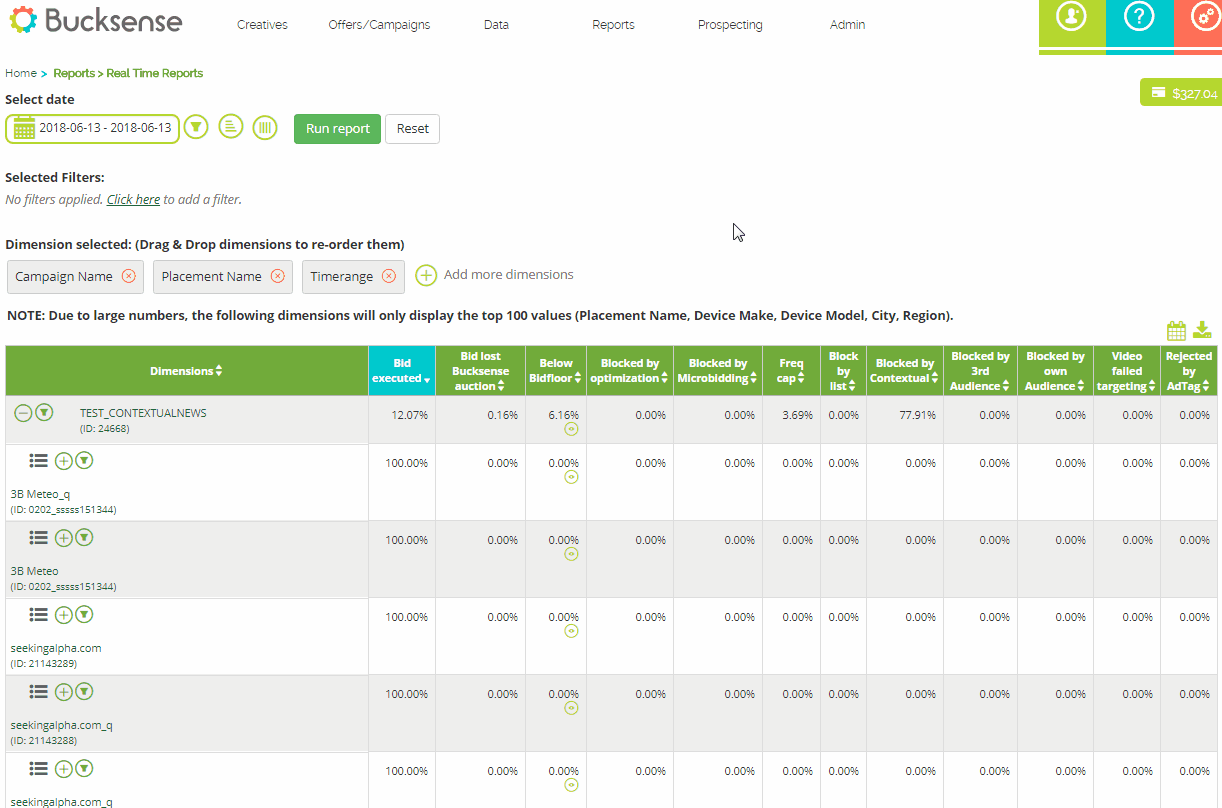
Bucksense Bid Opportunities Report provides a detailed view of your auction performance for every placement dimension, from site domain to placement name or App (App Bundle).
In the Report you can compare and analyze campaign bids per placement, and, also add them directly to custom white and blacklists.
Multiple metrics about the bid executed (first column) and the reasons (if any) for which your campaign, and, the related placements, did not participate in auctions for the available inventory will be shown.

- By clicking on a placement name, you will access the bid opportunities chart and table, which show you the potential CPM values and the related impression volumes.
- Click on List Icon
 to choose from the report the placement name(s) you want to add to a list.
Click on Manage List Button and check the option that you want to apply: create a new list, add these placements to an existing list or include these placements as a new white or black list for a campaign. (See more about List management here)
How to read and analyze the report
The Bid Opportunities report provides useful statistical data for your campaign and placements bids:

- Bid Executed: this is the percentage of auctions you participated in, compared to the total number of bids the campaign/placement could have made
- Bid lost Bucksense Auction: these are the bids that your campaign/placement lost because you compete with other campaigns/placements with the same settings in the console
- Below Bidfloor: this shows you the percentage of auctions that the campaign/placements did not participate in because your CPM value was too low.
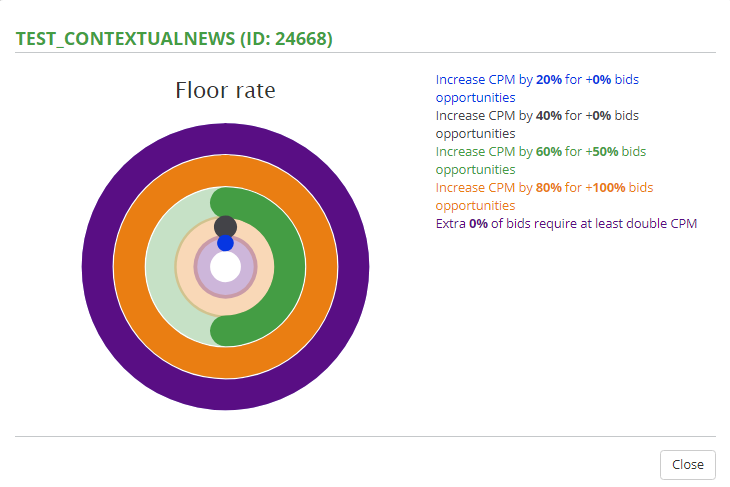
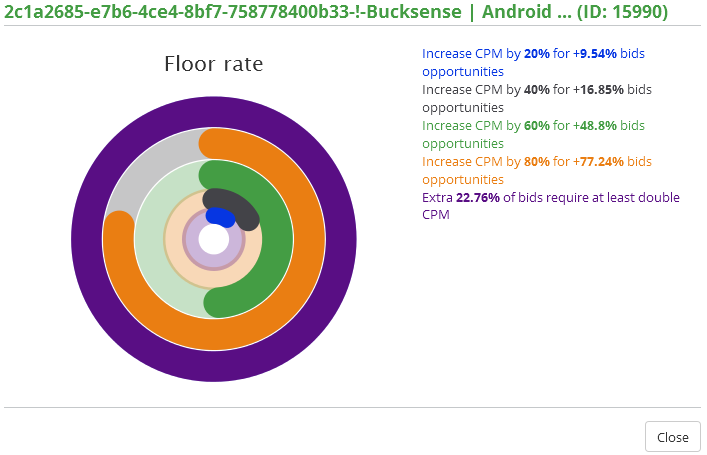
By clicking on in the Below Bidfloor column, you can access the Floor rate. This chart provides insights on the percentage amount you should increase your CPM (campaign or placement), in order to increase the number of auctions where your campaign/placements can participate (bids opportunities).
Looking at the sample below, if you want an increase of 48,8% in auction participation, Bucksense suggests that you increase your CPM by 60%.
- Blocked by Optimization: (for campaigns with optimized spend). These are bids that your campaigns didn’t participate in because the Bucksense optimization algorithm automatically eliminated the bids that are not performing well
- Blocked by microbidding: This refers to the bids you didn’t participate in because of your manual microbidding rules
- Freq Cap: the bids that you would have been able to participate in, but the frequency cap blocked them
- Block by list: these are the available auctions in which your campaign/placements did not participate in, due to its whitelists and blacklists
- Blocked by Contextual: these are the available auctions in which you did not participate because the campaign has custom targeting settings (contextual category audiences)
- Blocked by 3rd audience: in this case the campaign hasn’t participated in all the available auctions because it has defined a specific audience to target which restricts participation in auctions
- Blocked by own Audience: these are the bids that are blocked because you have defined a specific audience (App or site)
- Video failed targeting: in this case your video campaign does not match the targeting and so has not participated in the auction
- Rejected by AdTag: this refers to the bids that the campaign didn’t participate in because its adtag doesn’t match the campaign targeting
Example 1.
 In this campaign:
- 3,98% of the available bids were executed
- The campaign didn’t partake in 79,52% of the available auctions because the CPM was too low
- It did not partake in a further 16,49% of the available auctions because of the frequency cap settings.
Therefore, to increase auction participation, and thus increase campaign traffic, you should raise your CPM in the budget & spend type section.
Additionally, you can adjust your frequency cap settings to recover the 16,49% of lost auctions.
Checking the floor rate chart will help you decide by how much to increase your CPM. In this example, to increase your bidding opportunity by 30,73%, Bucksense recommends that you could increase your CPM goal by 40%.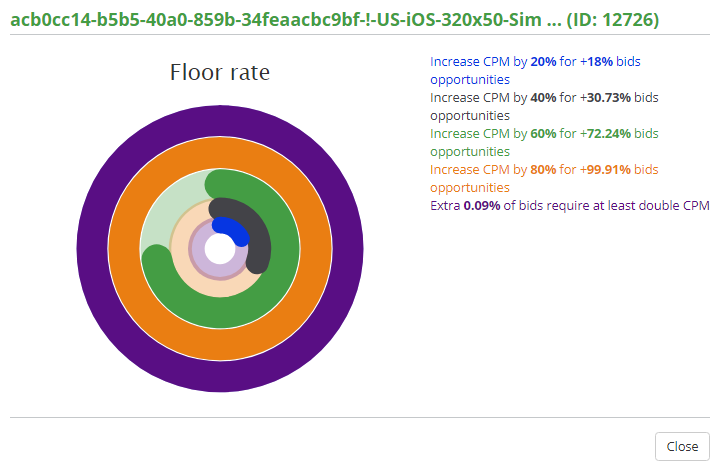
Example 2.

In this placement:
- Bids executed were 40% of the available ones
- The placement didn’t partake in 20% of the available auctions because the CPM was too low
Checking the floor rate chart you can see that to improve the placement performance, the CPM should be increased by 60% to capture the +50% of auctions, and, by 80% to capture the +100% of bids opportunities that the current CPM misses.