
First of all you need to setup your Responsive ad units (see here how).
Once you have added your Responsive ad Units, you need to contact your Account manager to enable the Responsive Ads, then you can create your Responsive ads campaign, by following these steps:
- Click Offer/Campaigns and select Add Campaign from the dropdown menu.
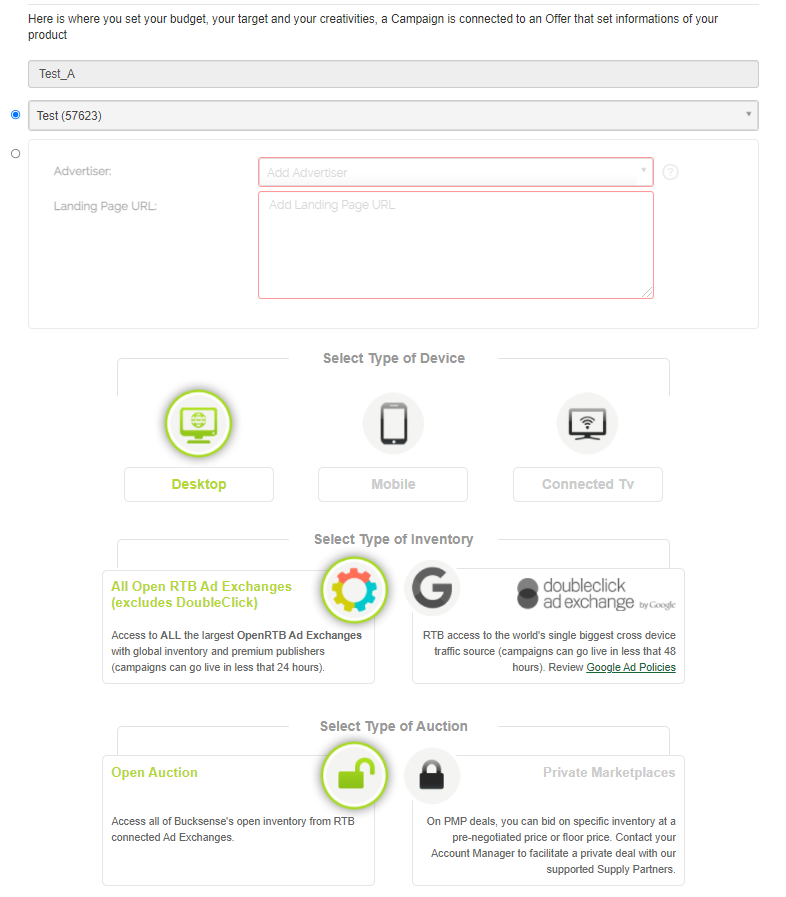
Name your campaign and select the offer that it belongs to or create a new offer by selecting the advertiser from the drop down menu and by typing the LP url
Choose the Campaign Type: Responsive Ads - Choose the Type of Device (Desktop, Mobile or Connected Tv), the Inventory (All Open RTB Ad Exchanges or Double Click Ad Exchange) and the Type of Auction (Open Auction or Private Marketplaces)
- Enter the Top Level Domain (primary level of your site URL ) and the Start Date.Then choose the campaign’s URL type from one of the following three options:
Landing Page URL: this is the default URL that you previously set up at the offer level
Additional URLs: this is the list of additional URLs (landing pages, web pages, etc), which you previously added at the offer level
A/B testing URL: a subset of URLs, taken from the additional URLs list, that will be rotated in the campaignSelect the type of traffic source (for mobile campaigns): App and/or site and device type.Advanced App Supply Settings can be enabled for mobile campaigns:
Traffic with Device IDs only (enabled by default): it allows you to target your mobile campaigns only on the exchanges that provide inventory with the device ID.
This option is selected by default to ensure you high ad quality standard. Disable it if you want to reach higher volumes of traffic
Interstitial Only: enable this option if you only want interstitial banners running in your campaignThe Ad Position option allows you to set a specific target for the position of your ads.
First of all choose one of the 3 following options:
Everything: select this option to palce your ads everywhere across the page
Above the fold: select this option in case you want to place your ads on top on a page
Below the fold: choose this option to place your ads at the bottom of a page. The users will need to scroll down the page to view your bannersPlease note that the Ad Position option is only present on limited sizes within the inventory pool. Selecting the above or below the fold filter, will limit the campaign results.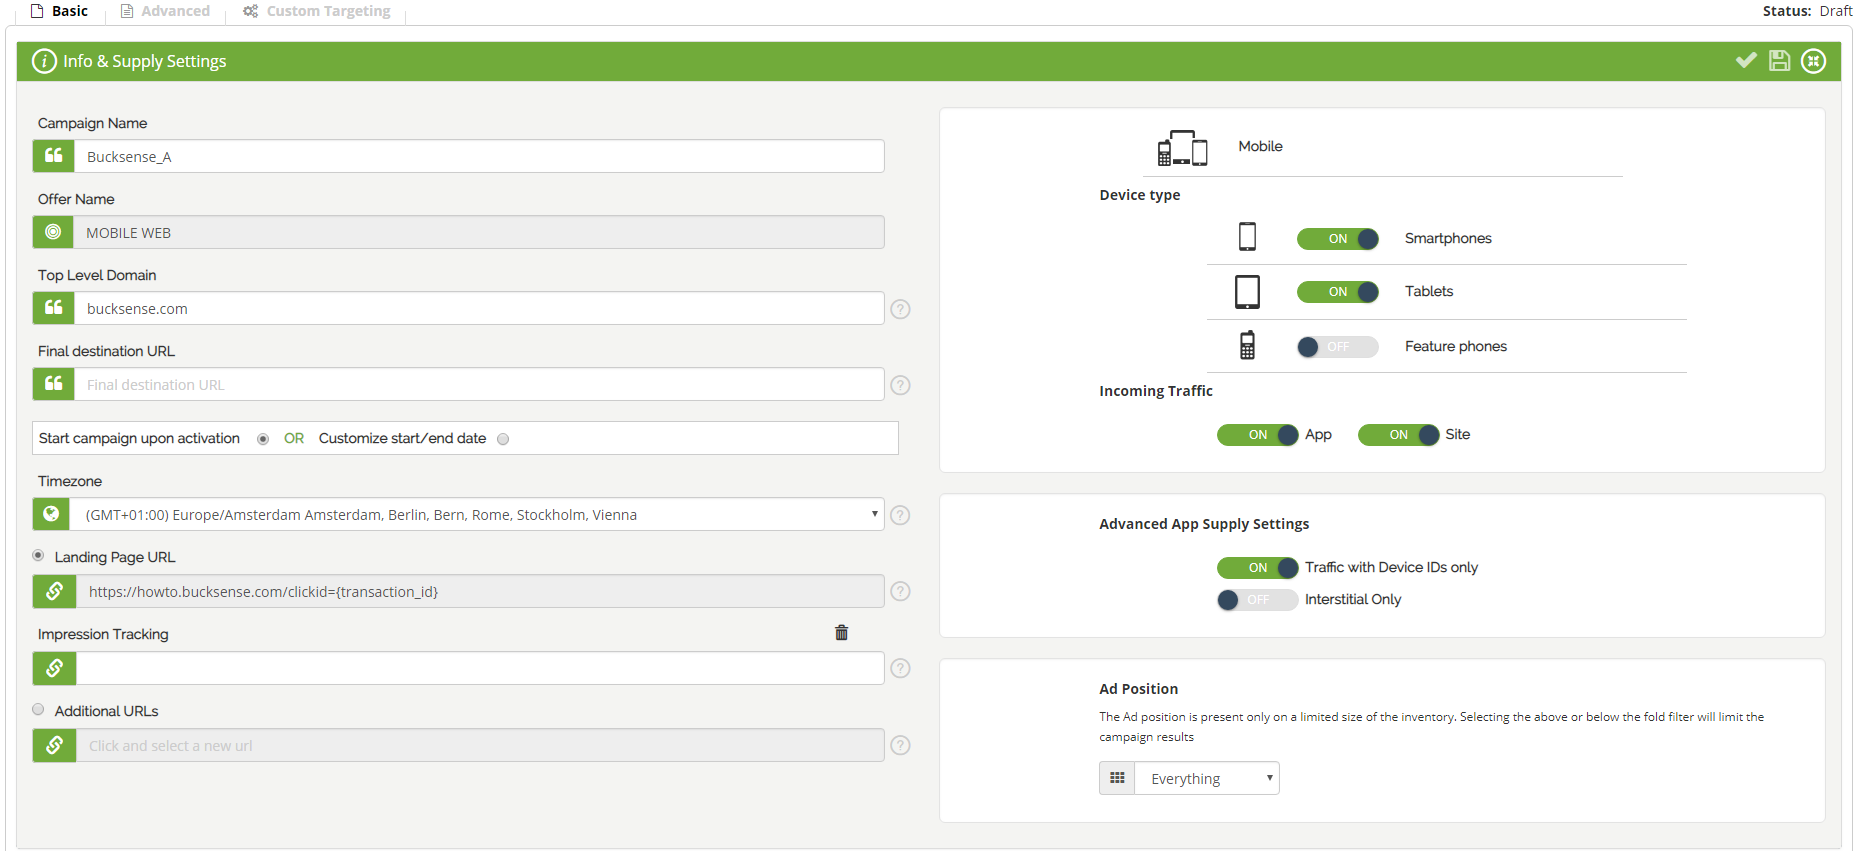
- Click Country and select the country/countries where you want to run your campaign

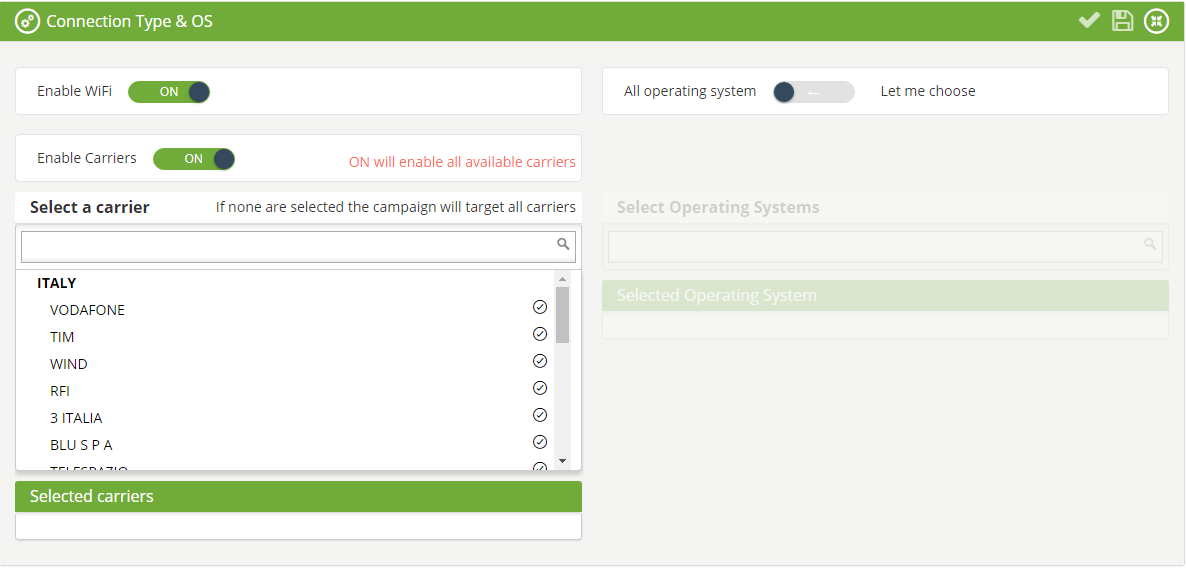
- Click Connection Type & OS and select Let me Choose if you want to pick up specific Operating Systems and/or Carriers (for Mobile Campaigns). In case you do not wish to receive WiFi traffic, disable this option and select the specific carrier/s
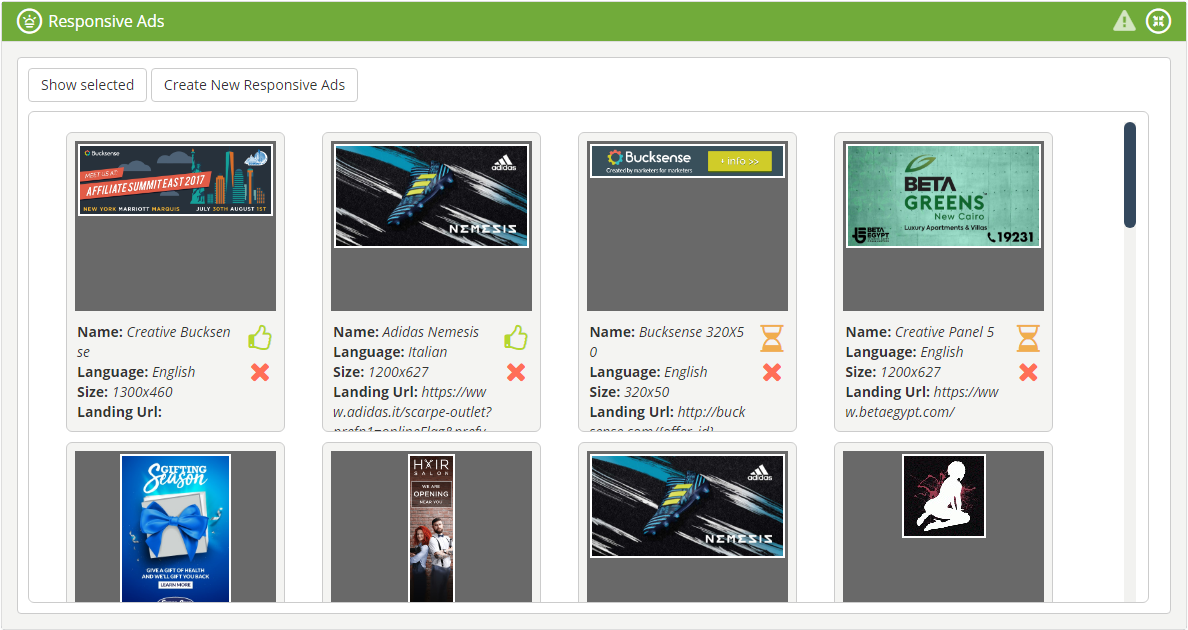
- Click Responsive Ads section, then click on Add Responsive Ads if you have previously uploaded creatives for this advertiser, then select the Responsive Ad you want to use in this campaign.
If you want create a new Responsive Ad click on Create New Responsive Ads button (see here how)
- Click Budget & Spend Type and choose between Manual (Flat CPM) or Optimized (Dynamic CPM).OPTIMIZED: select your Optimization Basis (CPC or CPL/CPI/CPA), enter your Optimization Goal, your Budget Type (capped or unlimited, the Total Campaign Budget, the Daily Cap and the Pace (spend as fast as possible or spend evenly throughout the day).You can also set an Impression Cap and/or a Click Cap (Daily or Total):
- Impression Cap: This is the maximum number of Daily/Total ad impressions that can be served.
For example, if you set a Daily impression cap of 20,000 then no more than 20,000 impressions can be served per day.
Minimum value that can be set is 1000. - Click Cap: This defines the maximum number of Daily/Total clicks for your campaign.
For example, if you set a Total click cap of 5000, your campaign will not exceed this number.
Minimum value that can be set is 100.
The campaign will be paused as soon as a cap, for Impression and/or Click, have been delivered (if you set a total cap for both: Impressions and Clicks, the campaign will be paused when either one of the two reaches the total limit).
Please note that if you have set one or more caps (Impression, Click, Budget) at the Offer level, your campaign will be paused as soon as the lowest cap among those set is reached (see more about Offer caps here)
If you have chosen MANUAL, you will have to optimize your campaign manually and you would not be using our smart algorithm for optimization.
You need to set up: a CPM App/Site target, your Budget type (Capped or Unlimited), the Total Campaign Budget, a Daily Cap and the Pace (spend as fast as possible or spend evenly throughout the day).
You can also set a daily Impression Cap and/or Click Cap (see above).
Bucksense helps you to find an estimated CPM starting value by suggesting CPM values.
These suggested CPM values are available for both In-App and Site (depending on your campaign’s Supply Settings ). These should be considered as “startup” values to access the auctions and are based on matching your campaign settings to the inventory data.
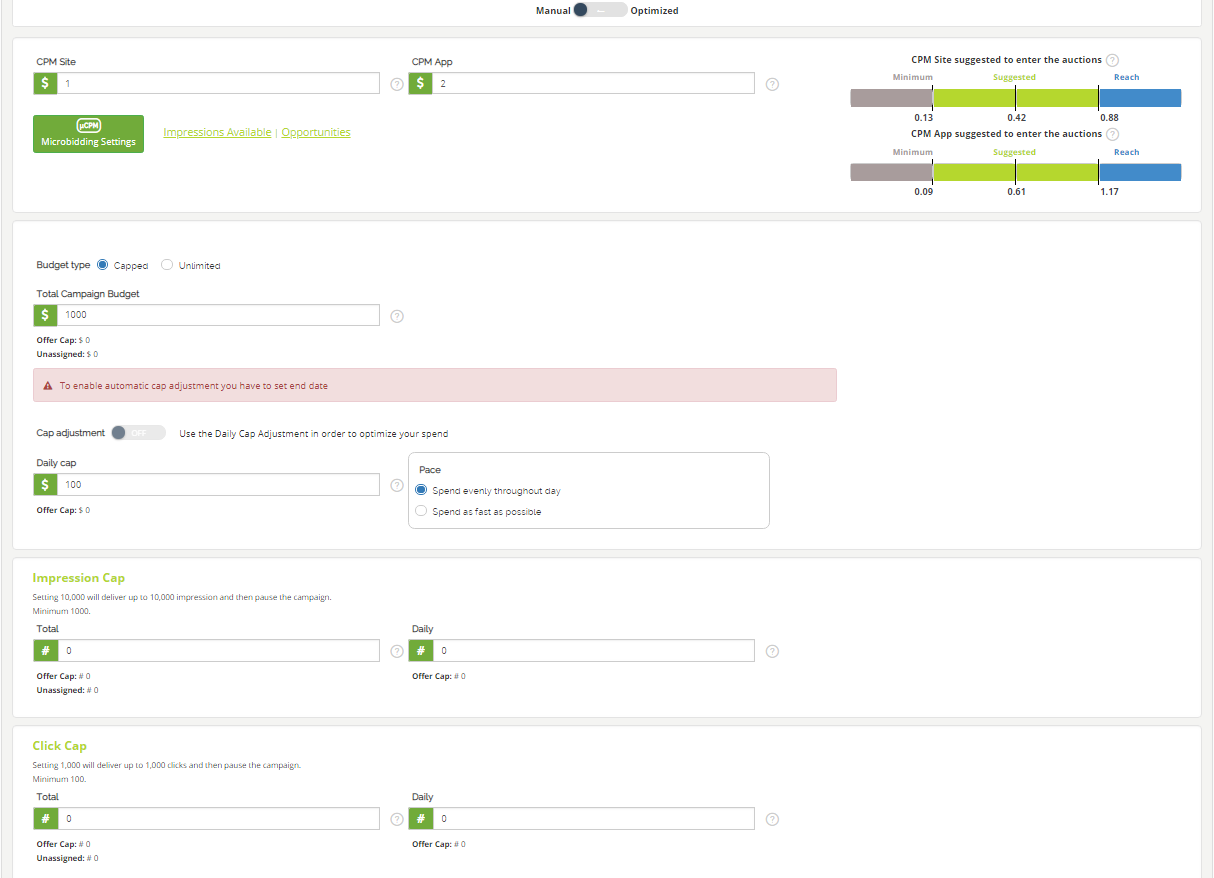
On the left side of the Budget & Spend Type section (only available for Manual spending), you will find two very useful links: Impressions available and Opportunities.
The Impressions available tab provides a funnel chart showing how the available inventory decreases with the targeting settings you entered.
Opportunities tab is an useful chart to check once your campaign is live.
It gives you suggestions about how to increase your CPM in order to increase the number of auctions where your campaign can participate (bids opportunities).
- Impression Cap: This is the maximum number of Daily/Total ad impressions that can be served.
- You are done! Now Click Activate to submit your campaign.