
Creative Attributes allow you to add specific targeting details to individual creatives. This flexibility allows you to overwrite the general targeting details set at the campaign/offer level.
How does it work?
Based on the creative type, you can set the following additional details for each creative you upload to the Bucksense console:
- Language
- Click Url/Email/SMS/Call
- Impression Tracking Url
This will enable you to create targeting exceptions for these banners that will overwrite the settings added at campaign/offer level.
Example 1: You create two banners, the first with the Language set to ‘Italian’ and the second banner set to ‘French’. Both banners are uploaded to a campaign targeted to France. This strategy ensures that users in France, who are using an Italian browser will see the Italian banner and users with a French browser will see the French banner.
Example 2: You create a campaign with 3 banners (A,B,C). At the campaign level you add the Click URL: www.test.com. But for banner A you add the Click url: www.bucksense.com
In this case, users will click on banner A will be redirected to www.bucksense.com, whereas users who click on banners B and C will be redirected on www.test.com.
Example 3: You set up your campaign with 3 banners (X,Y,Z) and the following Impression Tracking Url: https://sampletrackingurl.com. But for banner Z you add the Impression Tracking Url attribute: https://trackingurl.com. Every time X or Y is served, you will be notified on https://sampletrackingurl.com, whereas for Z, you will be notified on https://trackingurl.com.
How to add Creative Attributes in the Bucksense console
In the console you will have the option to add some or all Creative Attributes depending on the type.
To do so, please follow these steps:
1 Click Creatives tab and select a creative between: Banner, Native, Video and Ad Tags from the drop down menu (Banner in the sample below)
2 Hit the Add Creative Button ![]()
3 Select the advertiser, assign a name to the creative and upload the corresponding file. Click on the Save button to save your progress.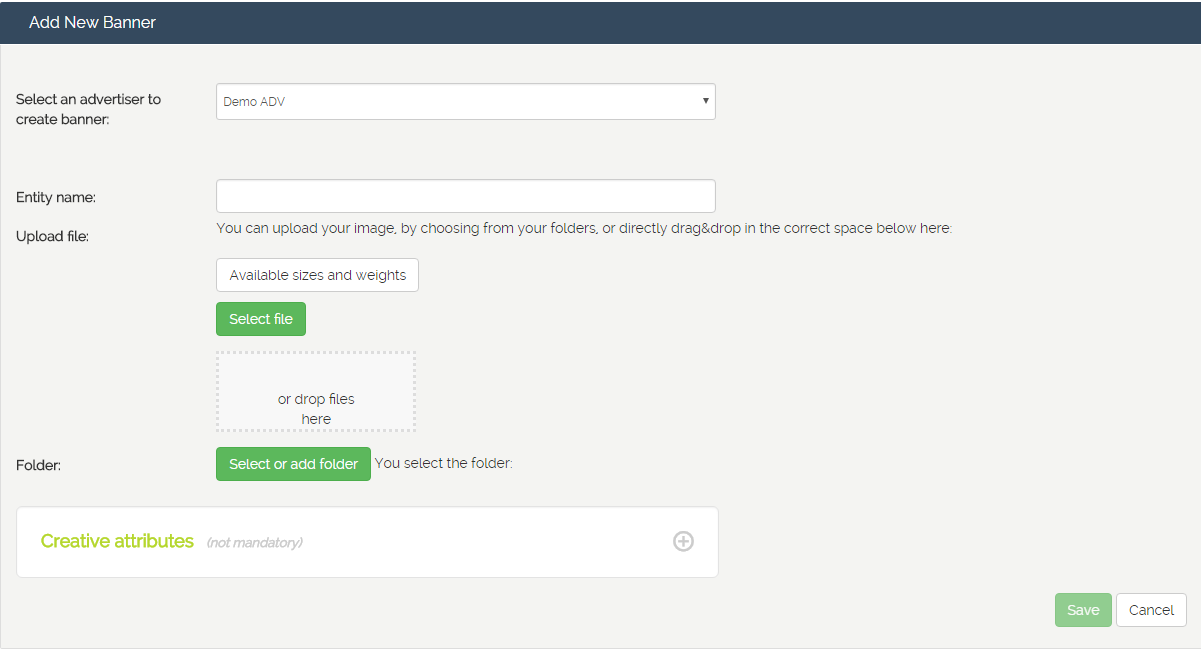
4 Click on Creative Attributes, and add your exception(s):
- Language: Select the language from the drop down menu
- Click Url: enter the Landing Page Url where you want your users to be redirected to
- Email: Set up an email address, a Subject and a text Message which will be automatically filled out in the user’s email client
- SMS: enter a phone number (we suggest to add the international prefix) and a text message which will be automatically filled out in the user’s sms editor
- Call: enter a valid phone number (we suggest to add the international prefix)
- Impression Tracking Url: Enter the URL where you want to be notified when an impression is delivered.

5 Review the details of the creative you have just uploaded and click on “Save” to confirm
How to check Creative Attributes in the Bucksense console
You can easily check the attributes you have set for your creatives in the console.To do this, click on the Offer/Campaigns tab, select Campaign List, and click on the Campaign Name.
Access the Creative section and check the Creative Attributes details in the green box..
The creative attributes that have been set are in green. If they are in grey, this means that they have not been set yet. Click on it to to view the details.
