
In digital advertising world, Geo-Targeting is one of the most important strategy that an advertiser can make to ensure that its ad campaigns reach the right audience in the right place.
This represents an opportunity for advertisers and brands to personalise their messages to users based on their current location, and, show different messages to people depending on where they are.
Some Advantages in use Geo-Targeting:
- By customizing ads to users based on their location, you are much more likely to show them something relevant and therefore much less likely to be blocked or ignored
- They are timely. Since location data is served in real time, there is an opportunity for brands to target people at certain times
- A better ad targeting saves you time and money by not serving your ads to users who literally could not care less about it
You can run Geo targeted campaigns in Bucksense, simply by creating GEO Lists to associate to your campaigns.
At the same time GEO Lists allow you to blacklist all GEO locations that are not relevant to your audience.
See more about List Management here
How to create Geo Lists
Follow these steps to create GEO lists in Bucksense console:
- Click on Geo List below Data tab

- Click on
 to add a list
 - Select an Advertiser, add a List Name and select GEO as a list type
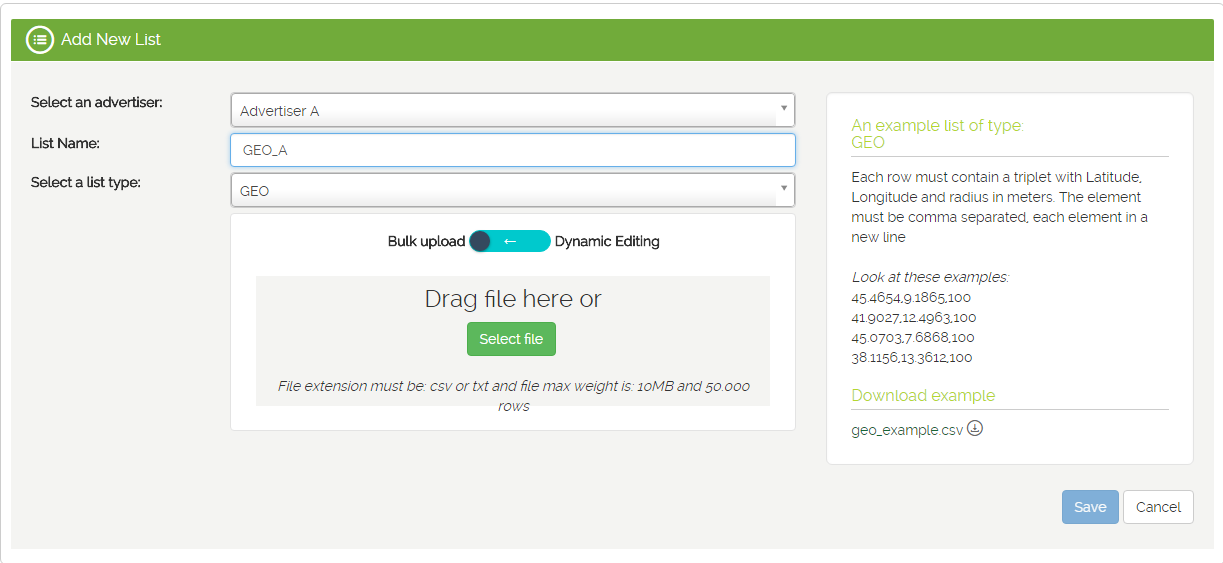
- You have the choice to either: Bulk Upload or Dynamic Editing.
Bulk Upload
This option allows you to upload a csv or txt file (max weight 10 MB) containing your list.
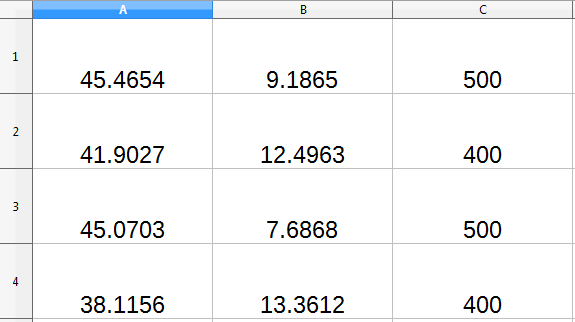
If you want upload your GEO list using a csv file, you need to insert Latitude, Longitude and radius (in meters) in 3 distinct columns of the spreadsheet.
To upload your list using a txt file, you just need to add in each row a triplet with Latitude, Longitude and radius (in meters). The items must be comma separated.

Then click on Save to create your list.
Dynamic Editing
By selecting Dynamic Editing you can manually type your single Geo Locations into the text area using the slide bar.
In each row, you need to include a triplet with Latitude, Longitude and radius (in meters).
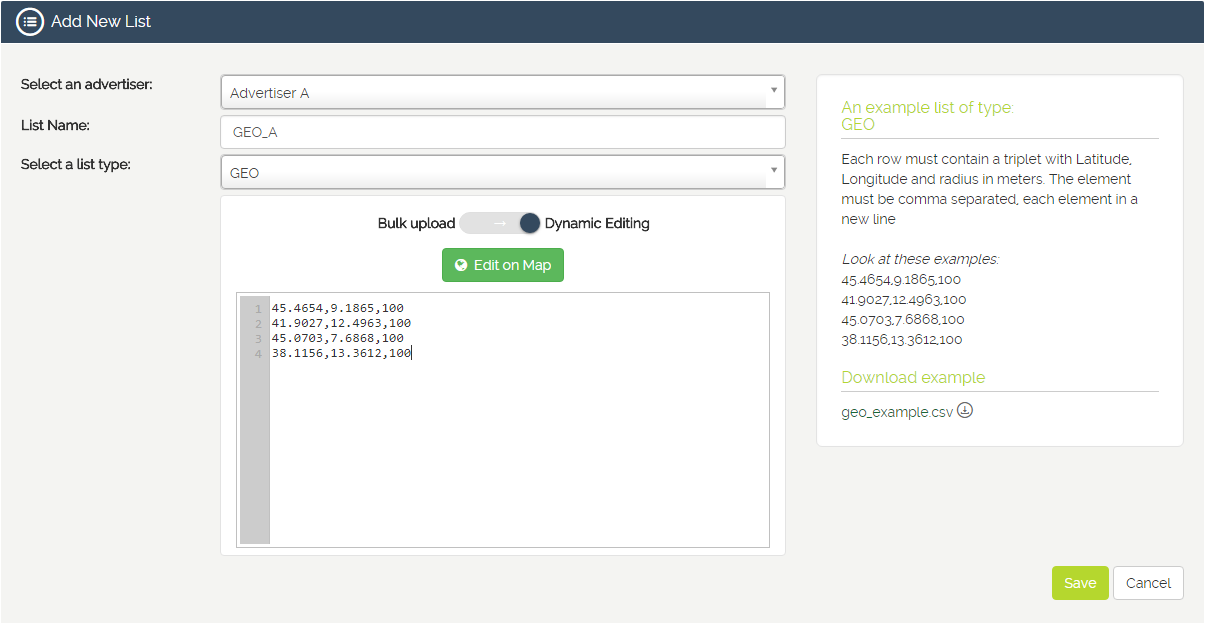
Edit on Map button allows you to view and edit on the map the items you have added through the Dynamic Editing, and/or, easily add new ones directly from the map.
The correct format for Latitude and Longitude coordinates
For both options: Bulk Upload and Dynamic Editing, the correct format to insert Latitude and Longitude coordinates is in decimal degrees (DD).
Find below some suggestions to be sure to use the correct coordinates formatting:
- the Latitude coordinates must be specified before Longitude coordinates
- the first Latitude coordinate number must be between -90 and 90
- the first Longitude coordinate number must be between -180 and 180
- use the ‘dot’ as a decimal separator (do not use a comma). Correct format is 45.4653 / Wrong format is 45,4653
- use the comma to separate Latitude and Longitude (do not use a dot). Correct format is 45.4654, 9.1865 / Wrong format is 45.4654. 9.1865
- check the coordinates on Google Map to make sure they are correct
Samples of correct Latitude and Longitude coordinates:
- 41.9035,12.4794
- 40.7138,-74.013
- 41.928,12.4068
Samples of wrong Latitude and Longitude coordinates:
- 48.3794.31.1656 (the dot to separate Latitude and Longitude is wrong, you need to use the comma)
- 41.31.88,72.5833 (there are two dots in the Latitude, you need to insert only one dot as a decimal separator)
- 41,3049,-72.4096 (you need to use the dot as decimal separator, not the comma)
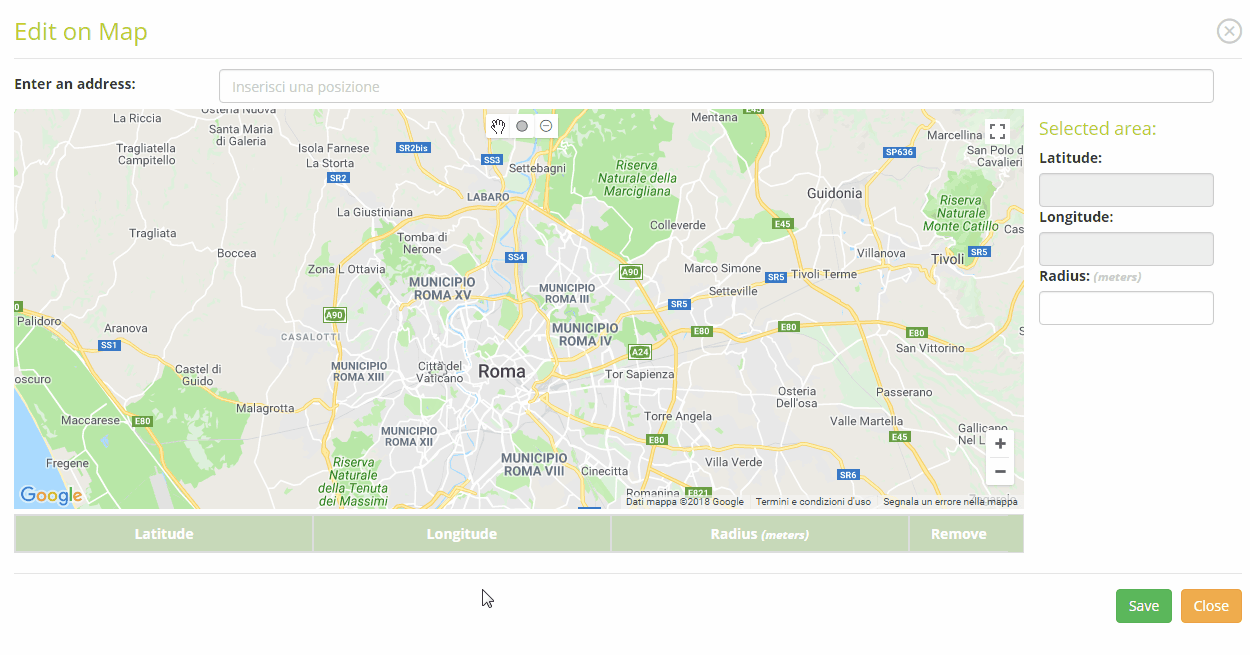
To add new Geo Locations/Address from the map you can:
– Enter a valid location/address you would like to target in the Google’s geomap.
You just need to type the location/address in the appropriate field and an area, having as center the location you entered, and, a default radius of 4000 meters, will be highlighted on the map.

If you need to change the length of the radius, you can easily do it, by entering the new value in the Radius field
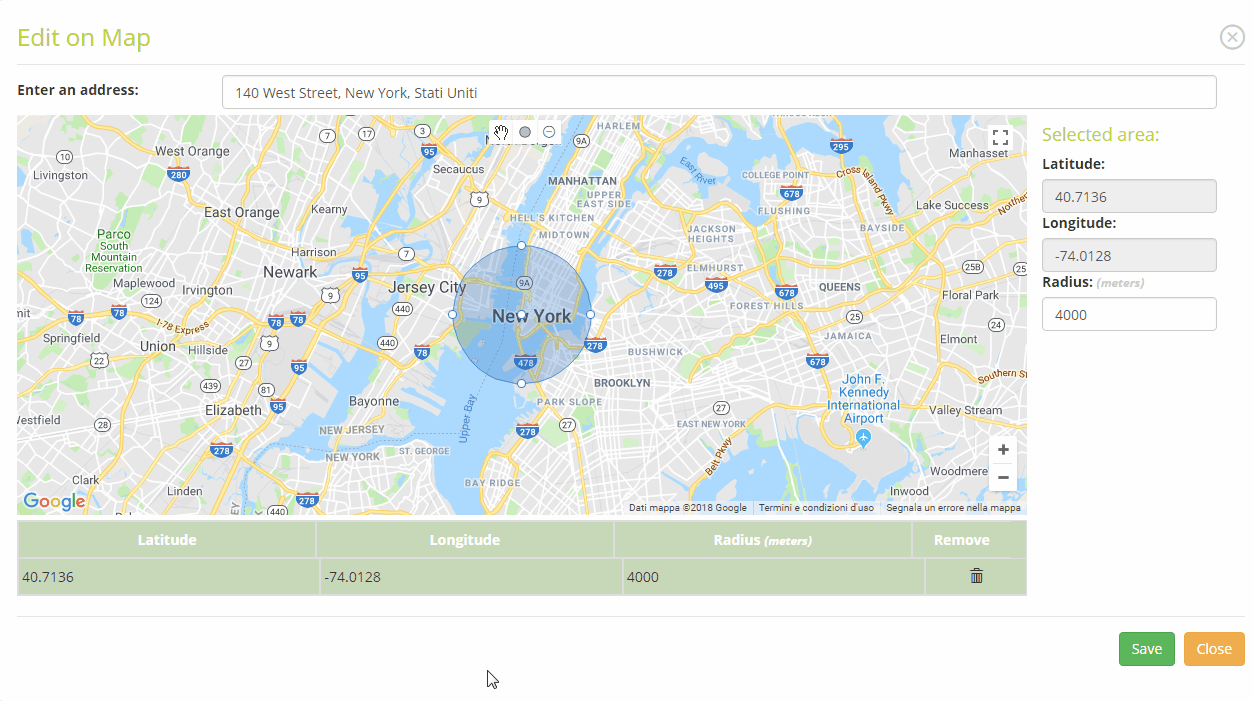
or by editing the highlighted area width, directly from the map, by moving one of the four perimeter points

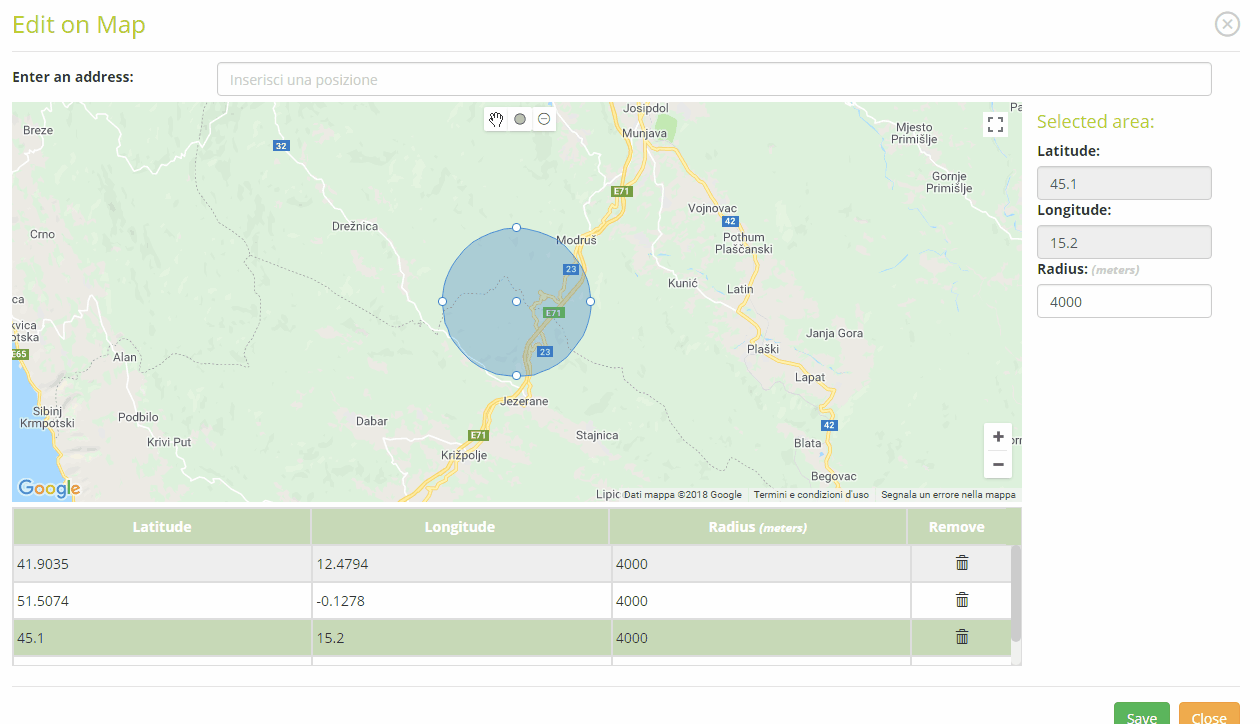
– Select the geographic area you want to target directly from the map
To do this, after you’ve found the location on the map (by using the search field or the ‘hand’ cursor), select the icon ![]() and draw a circle in the map
and draw a circle in the map
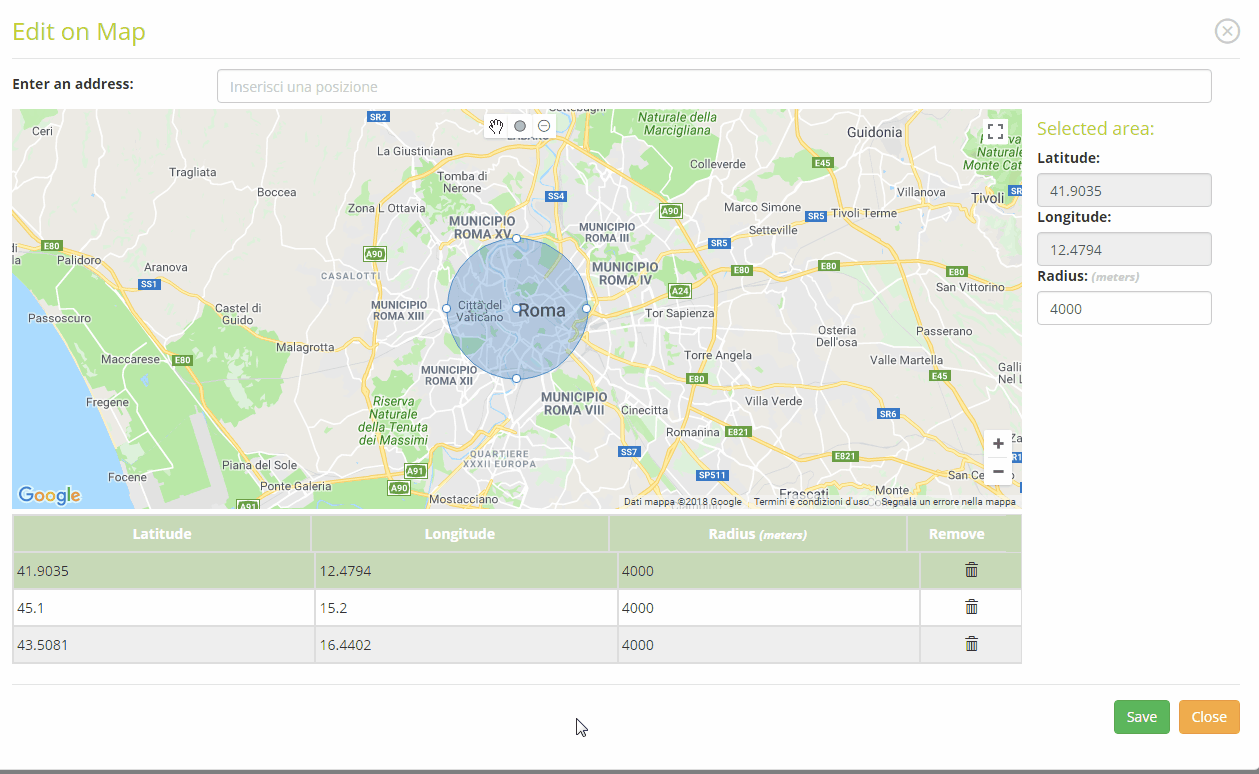
For each location added, you will display details about Latitude, Longitude and radius below the map. By clicking on one of them, you will display that location on the map.
You can easily edit the length of the radius in the appropriate field, or, if you need, remove the location.
Once you have added the location(s) on the map, click on Save.
Then click on Save in the Add New List section, to save your GEO list.
See here how to associate Lists to your Campaigns